How to create a Lenovo XClarity Essentials Bootable Media Creator image and update firmware for ThinkAgile HX systems
Step by step guide of creating a bootable media image and peforming updates for ThinkAgile solution
Step by step guide of creating a bootable media image and peforming updates for ThinkAgile solution
Description
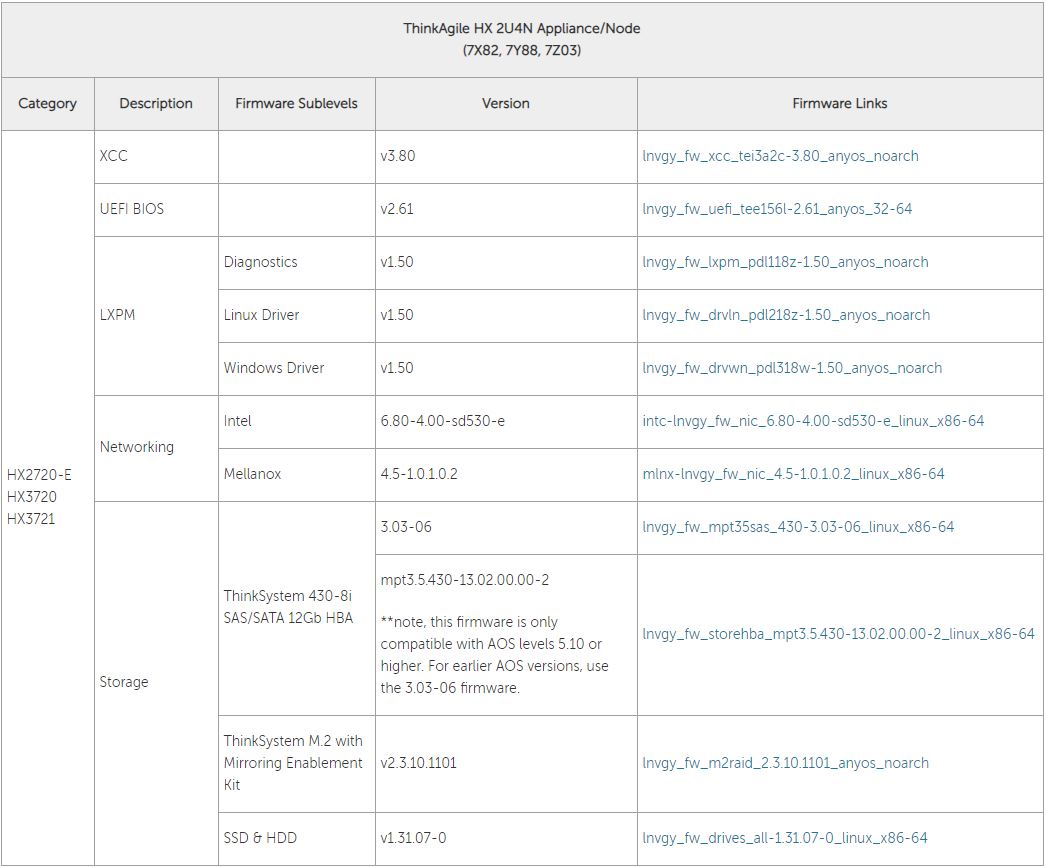
This article introduces the procedure used to create a bootable media image using Lenovo XClarity Essentials Bootable Media Creator (BoMC) and update firmware for ThinkAgile HX systems. Lenovo provides "Best Recipes" of firmware and drivers that have been tested together as a stack to run on certain products. Lenovo highly recommends that you use the Best Recipe in full to avoid unforeseen errors.
- ThinkAgile HX - Best Recipes
- Lenovo HX Series Best Recipe
- Lenovo Converged Best Recipe 2.0
- Recommended UEFI settings - 2nd generation, 3rd generation
- IMPORTANT information regarding security certificate change
Applicable Systems
ThinkAgile HX Series
Solution
Download the best recipe and create a bootable media using BoMC
- Go to https://support.lenovo.com/us/en/solutions/lnvo-bomc and download BoMC.
- Create a new directory on your workstation or laptop. Note: The directory name and path must have no spaces or special characters – for example, C:\bestr would be a good directory name.
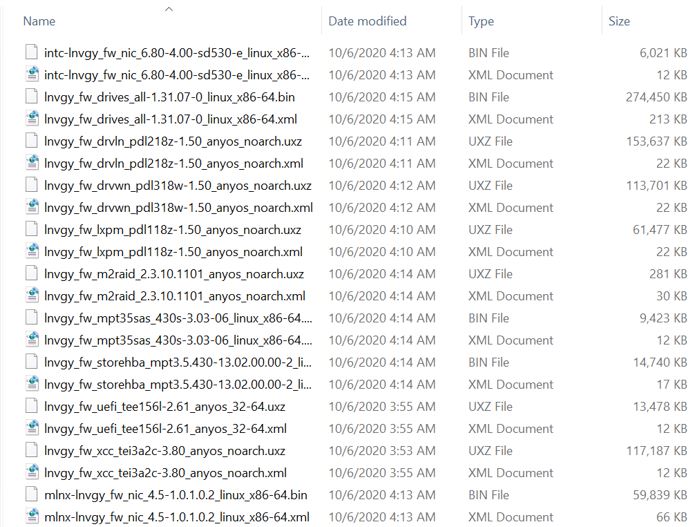
- Download the appropriate best recipe firmware into the directory. You will need to download an XML file and, depending on your device, either a BIN or UXZ file. In this article, best recipe 4.7 will be used:https://support.lenovo.com/solutions/HT510946.
a. Find the appropriate best recipe firmware for the target server.
b. Click each link, and then download the XML file and either the BIN or UXZ file. You may need to right-click the XML file and select "save as".
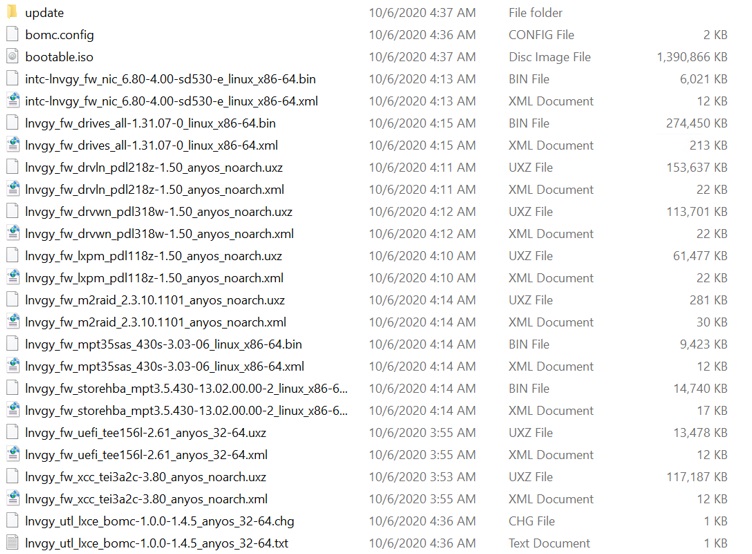
c. The download directory will look like the following example image.
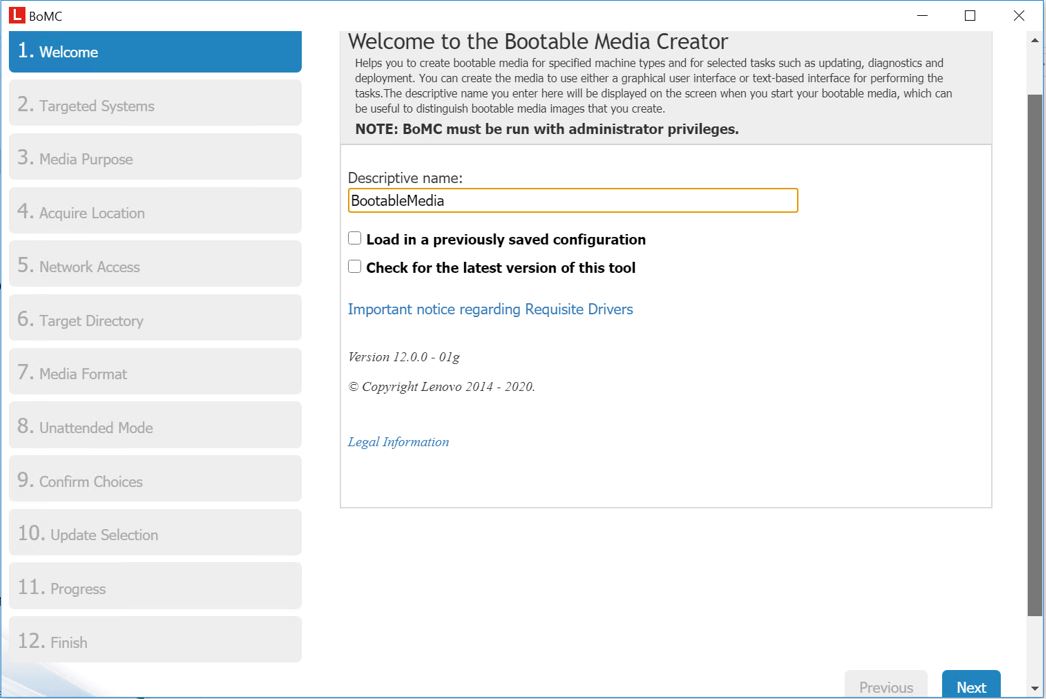
- Right-click the BoMC EXE file, and then select Run as administrator.
- If you want, enter a descriptive name, and then click Next.
- Select the ThinkAgile HX model type of your system in the Lenovo Platforms section, and then click Next. You can find the machine type on the machine service label or on the XCC homepage.

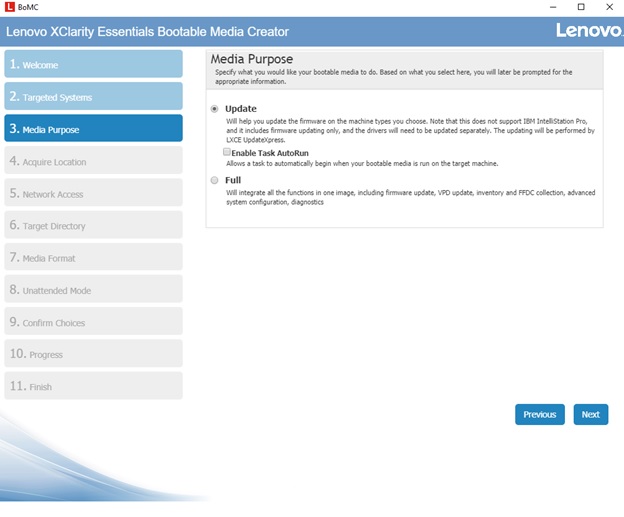
- Select Update, and then click Next.
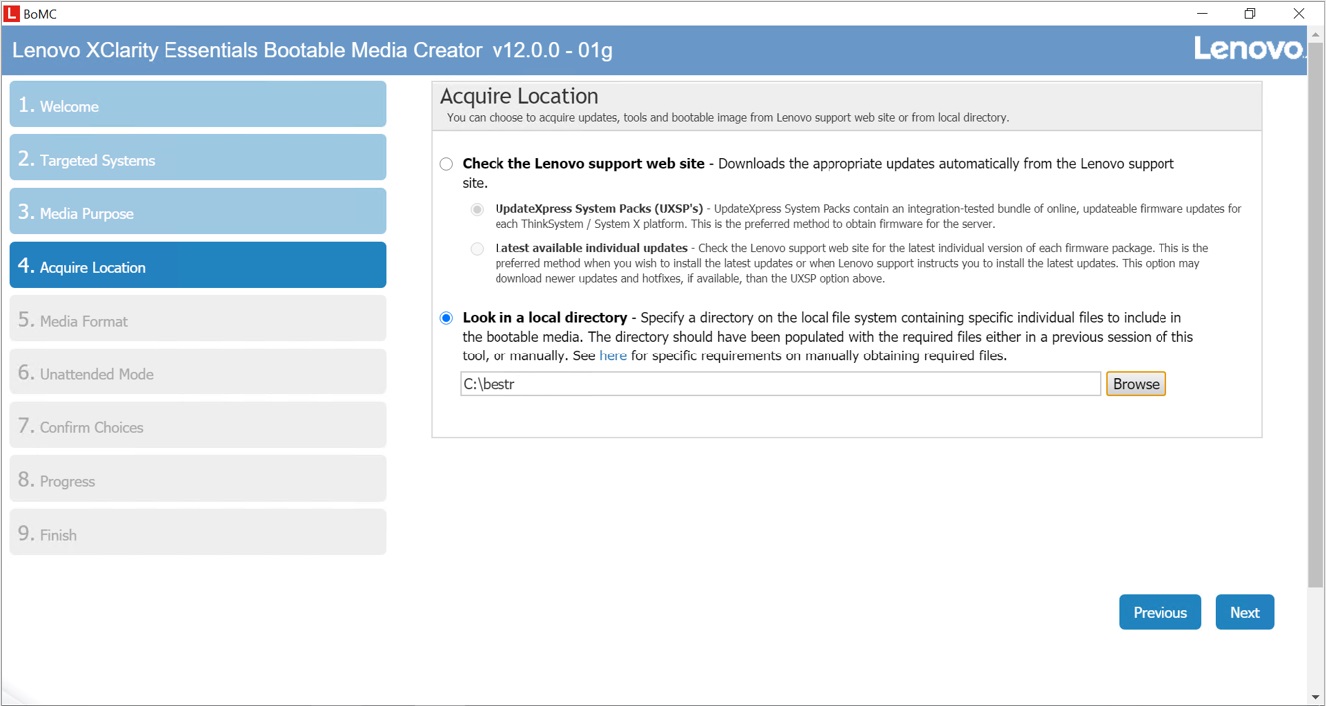
- Select Look in a local directory and choose the directory you've created. Then click Next.
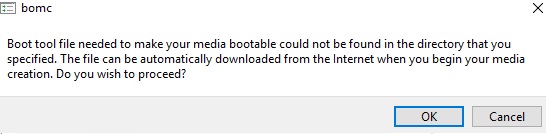
- A pop-up window will be displayed with a message asking for permission to download the files to create the ISO. Click OK.
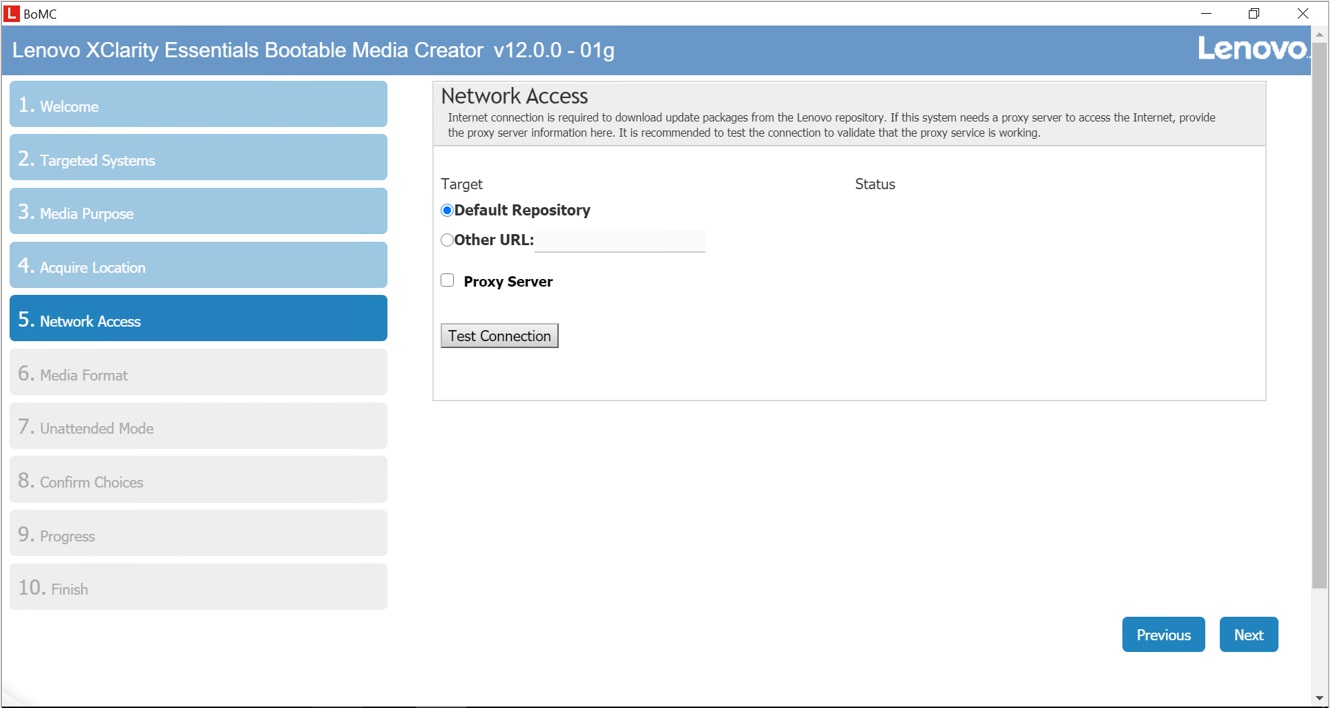
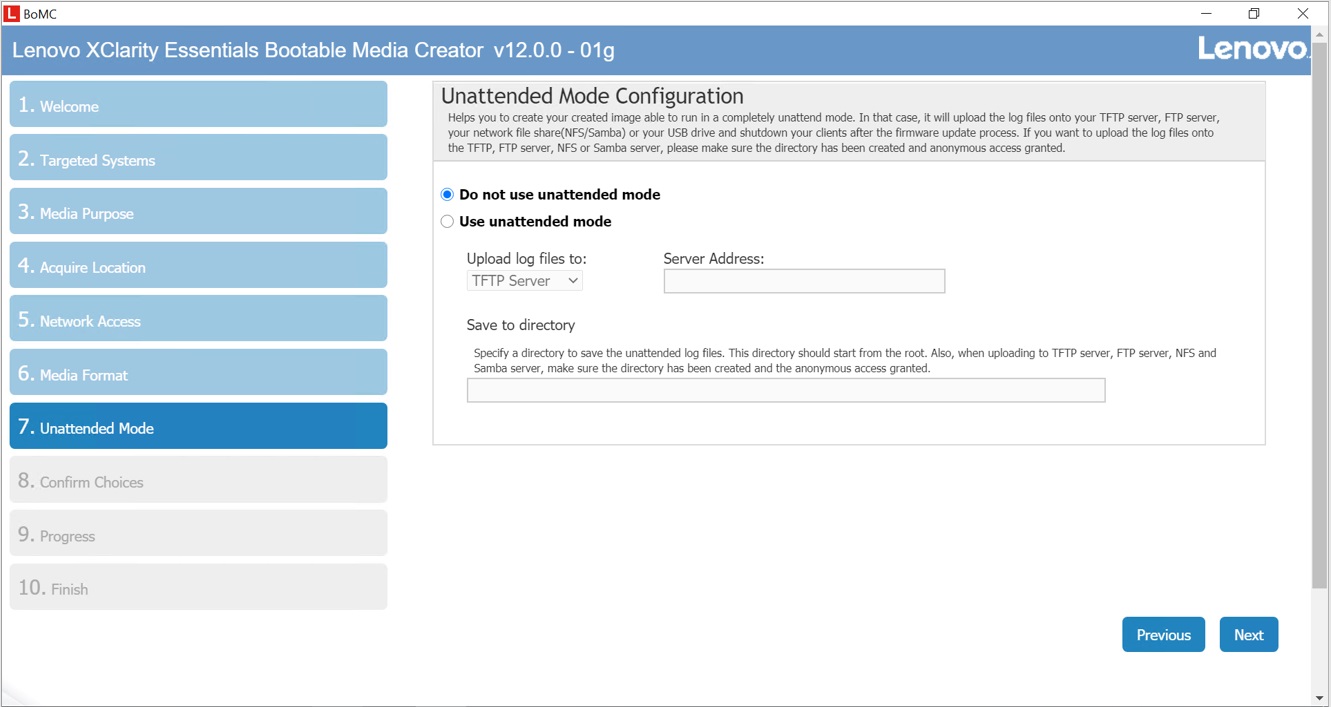
- If necessary, specify the proxy server information on the Network Access page, and then click Next.
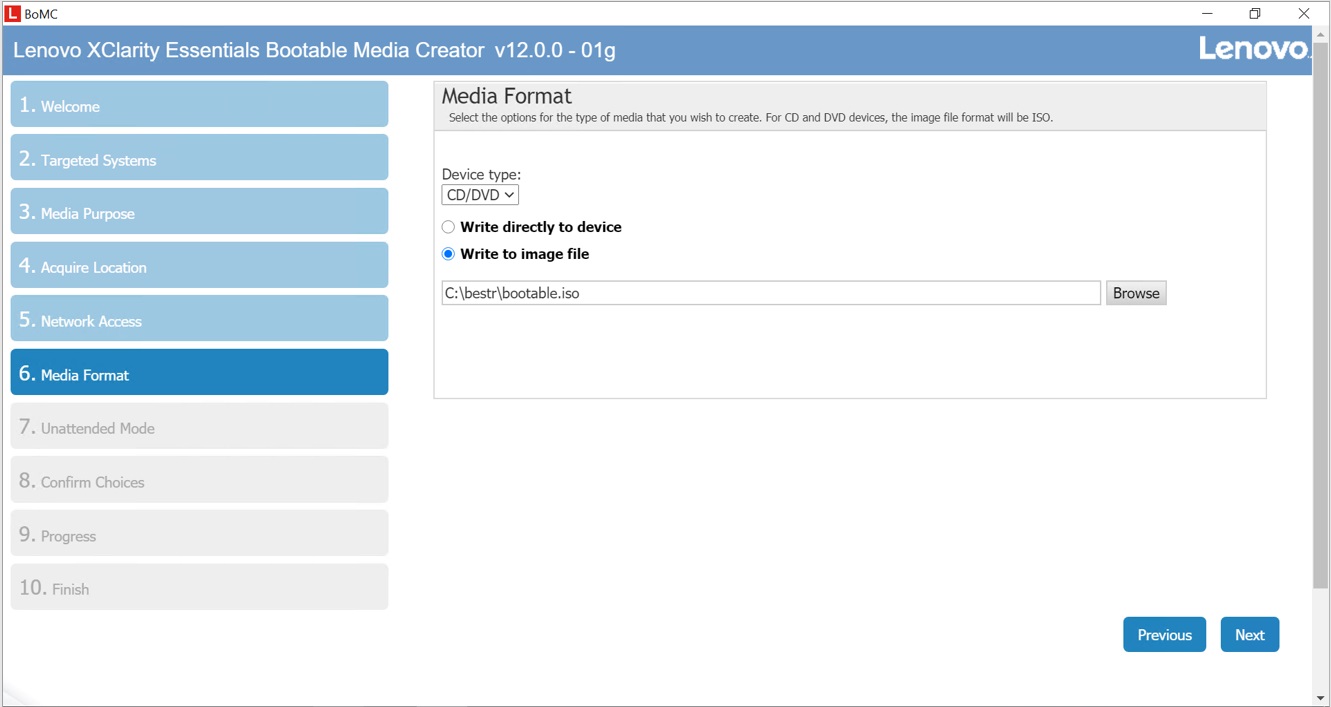
- Select CD/DVD from the Device Type drop-down menu, specify the path to create the bootable ISO, and then click Next.
Note: The path to the specified workingdir must be less than 76 characters.
- Click Next.
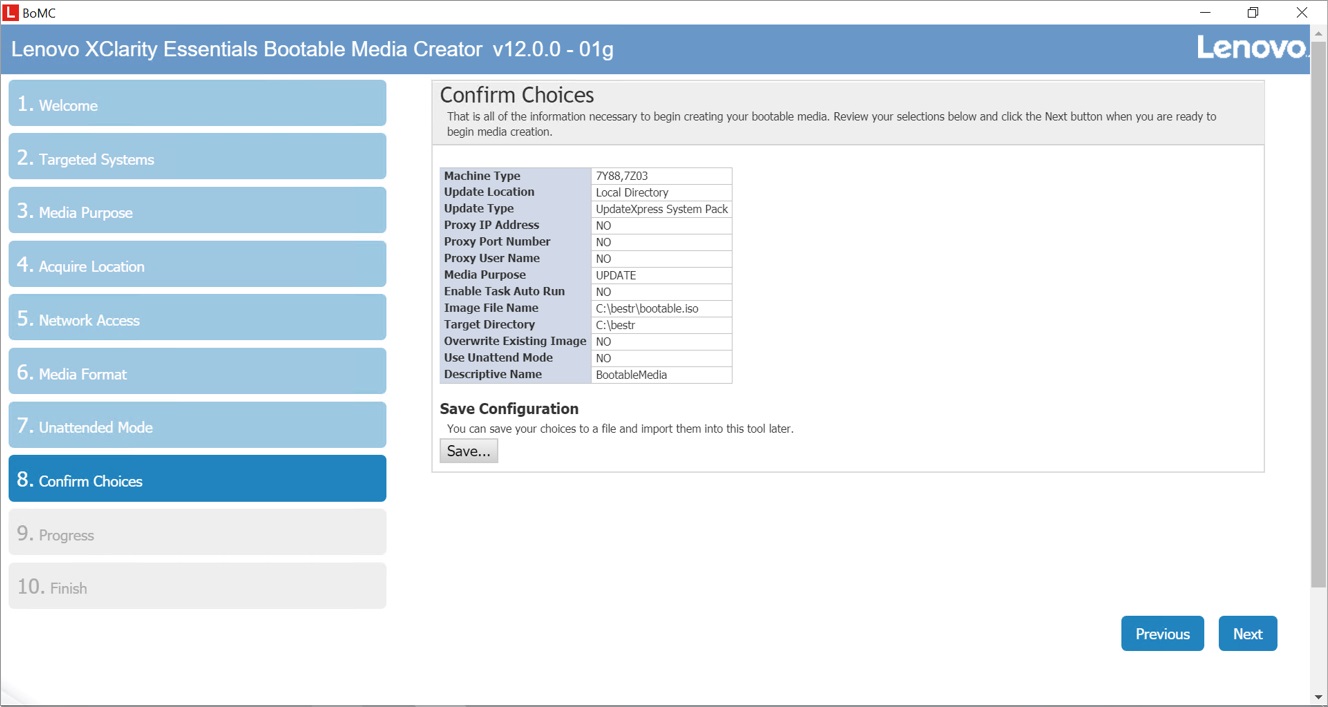
- On the Confirm Choices page, click Next.
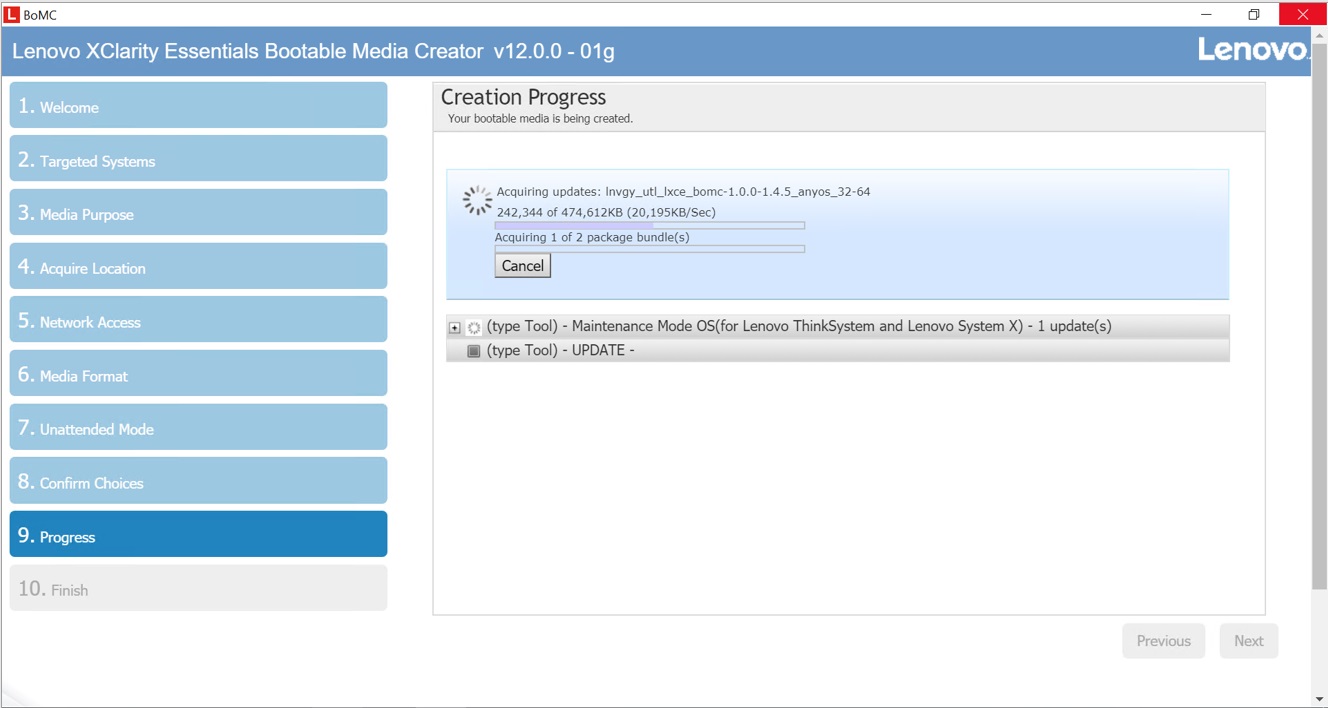
- The bootable media creation process will begin.
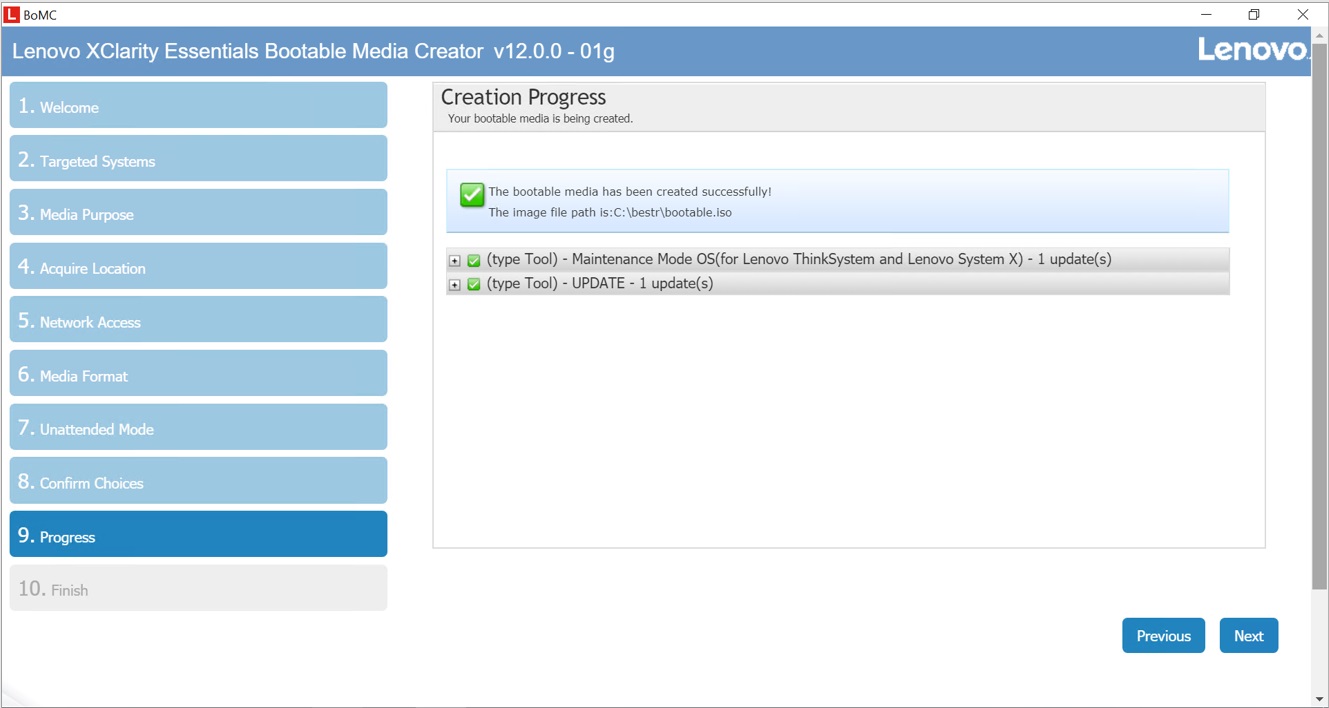
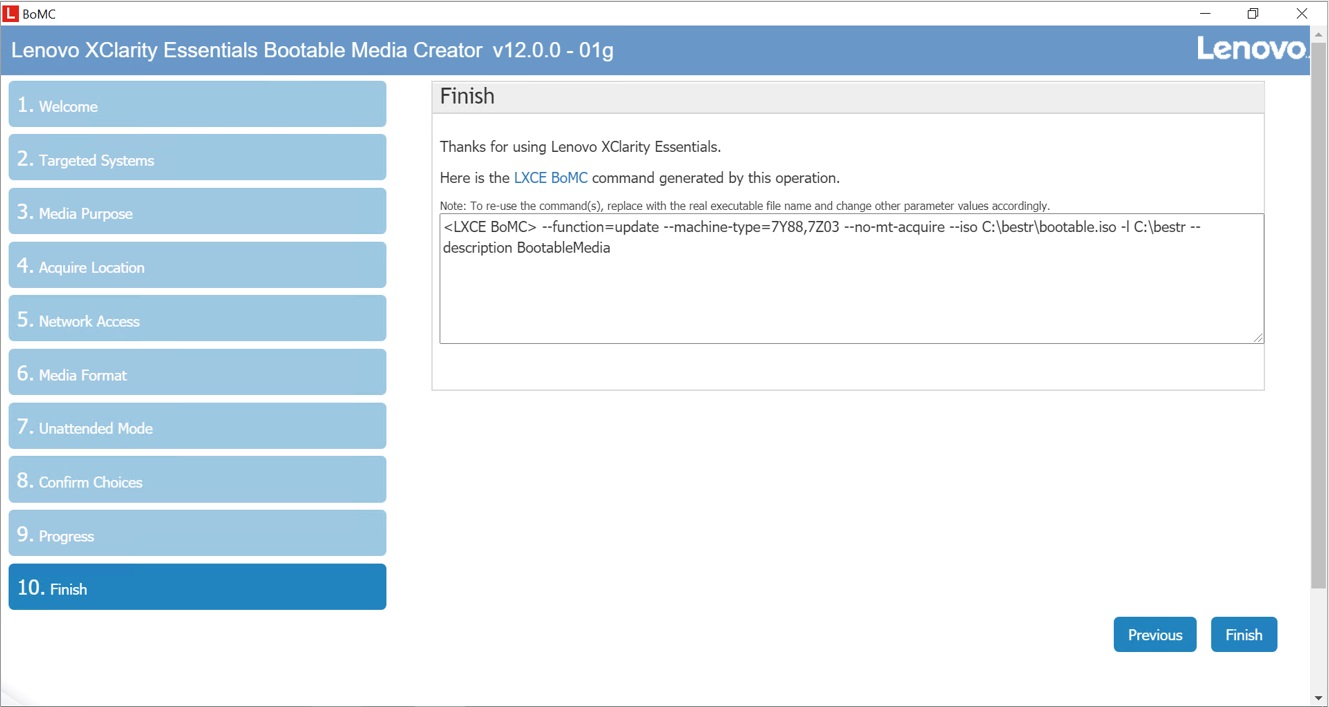
- When the bootable media creation progress is complete, click Next.
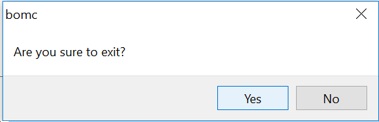
- Click Finish and then Yes to exit BoMC.
- The directory created earlier should now look like the example shown below. The bootable.iso file is the image needed for the update process section. The other files can be removed.
- Put your system into maintenance mode and shut down the CVM. For details on how to do that, refer to this article: How to shut down and restart the Controller VM and AHV host in ThinkAgile HX. Do NOT shut down the node.
Upgrade the firmware using the bootable media through the remote console in XCC/IMM
- Open a browser window to access XCC/IMM for the first node. For details on how to mount an ISO image locally through XCC/IMM, refer to this article: How to mount an ISO image locally through LXCC, How to locally mount an ISO through Integrated Management Module II.
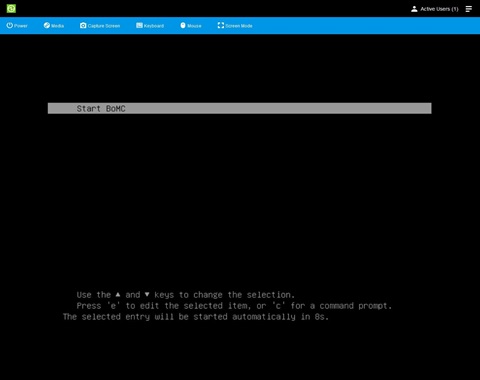
- After the boot process has started, press Enter or wait for the allotted time. You will be booted into a Linux environment.
- When the process is complete, Lenovo XClarity Essentials (LXCE) UpdateXpress will be displayed.

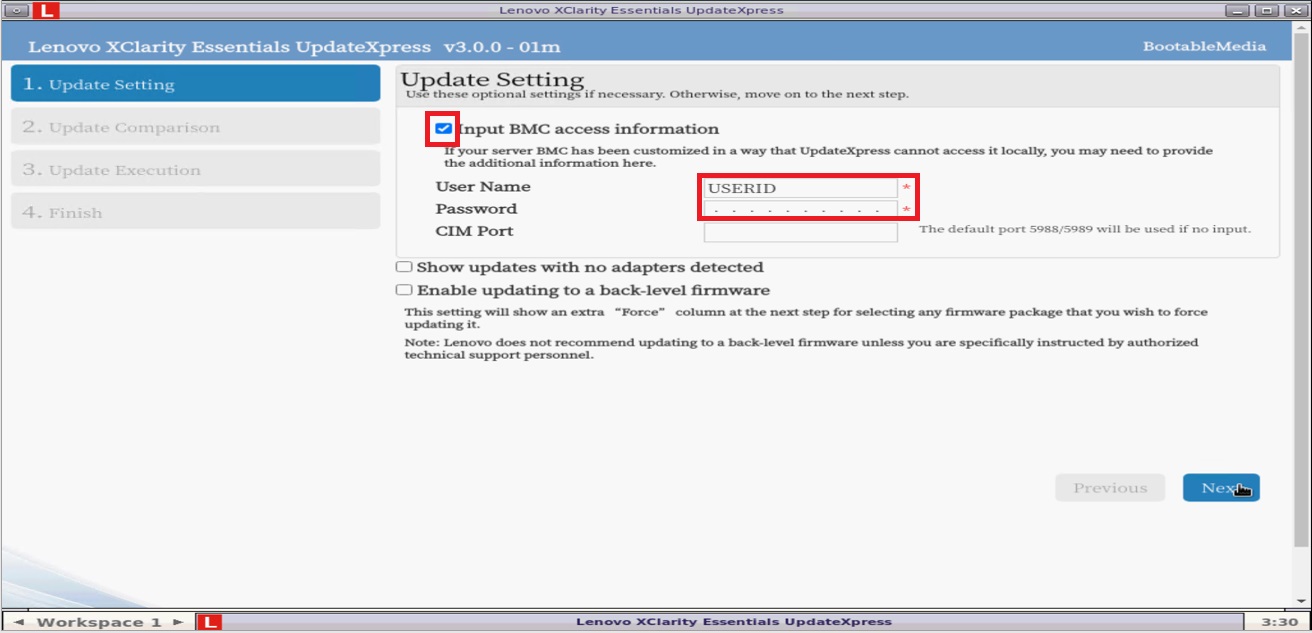
- Check the Input BMC access information box and enter a username and password if you would like to update the local machine. Click Next.
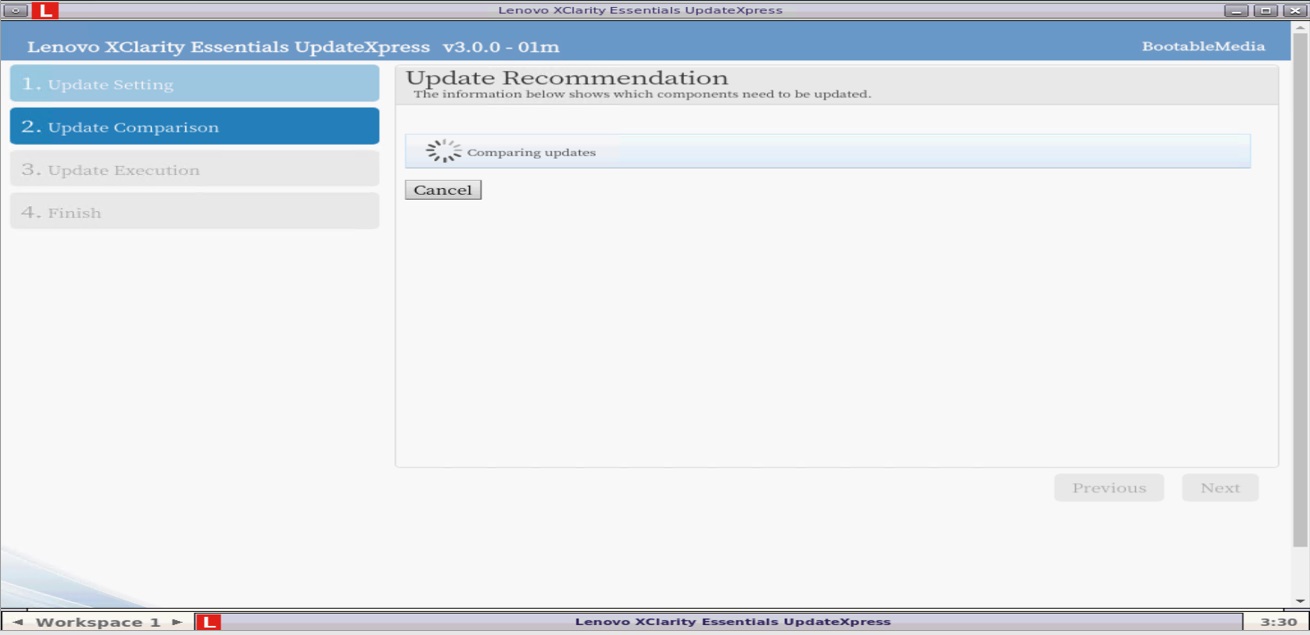
- UpdateXpress will begin comparing updates.
- The installed firmware on your system will be detected and update recommendations will be picked. Check the boxes of the components you would like to upgrade, and then click Next.

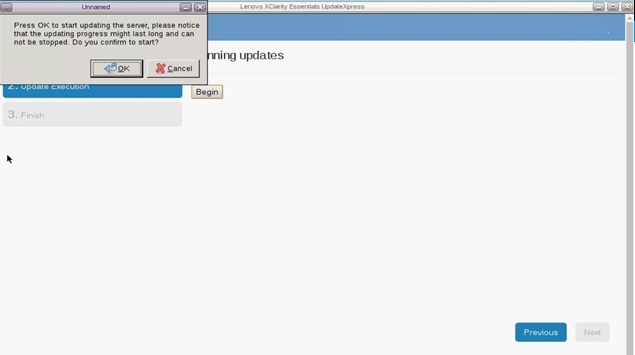
- Click Next and then Begin. You will likely get a prompt confirming the update. Click OK.
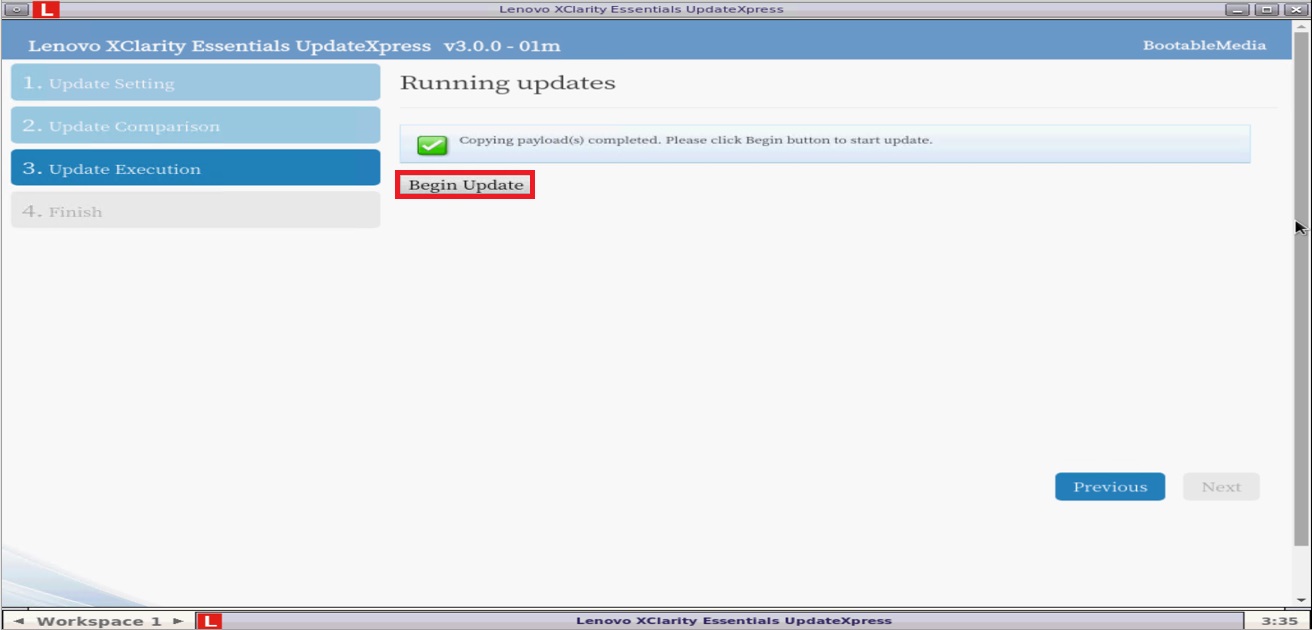
- After the payload has been transferred, click Begin Update.
- Click Yes to continue the update process.

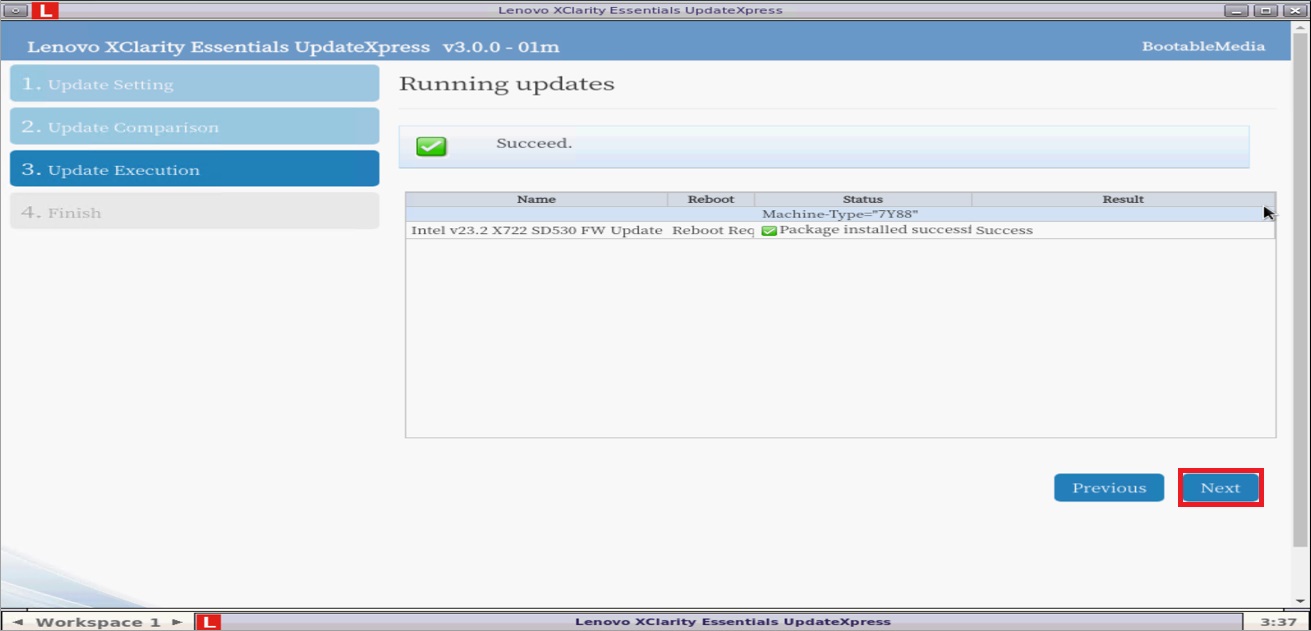
- When the process is complete, a Success message will be displayed. Click Next.
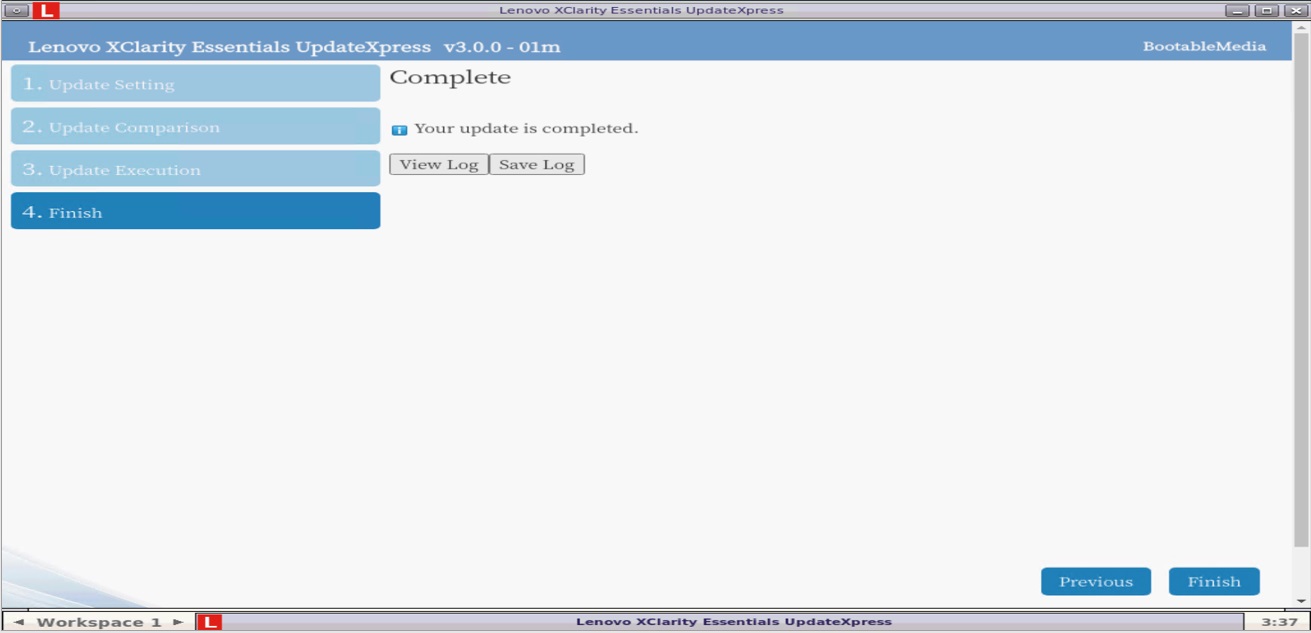
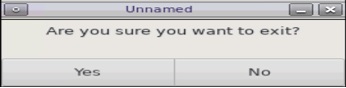
- The upgrade is complete. You will now have the option to View or Save the log. Click Finish, and then click Yes on the next pop-up window to exit the utility.
- The server will unmount the bootable media image and reboot your system automatically.
- Your system might reboot two or three times to complete the firmware update. After that, your node should boot back to your installed OS.
- Move your system out of maintenance mode. Details of how to do this can be found at How to enable or disable Nutanix AHV host maintenance mode for ThinkAgile HX
Video
Additional Information
Related Articles
- Lenovo DCG Firmware Update Page
- How to use BoMC to create bootable media and perform firmware updates on Lenovo servers
- How to mount an ISO image locally through LXCC
- How to mount an ISO locally through IMM2
- How to upgrade firmware using bootable media made by Lenovo XClarity Essentials Bootable Media Creator
Document ID:HT511359
Original Publish Date:11/05/2020
Last Modified Date:09/04/2024
