How to set the recommended UEFI settings for Lenovo ThinkAgile HX systems using the Lenovo XClarity Essentials Windows OneCLI batch feature
How to set the recommended UEFI settings for Lenovo ThinkAgile HX systems using the Lenovo XClarity Essentials Windows OneCLI batch feature
How to set the recommended UEFI settings for Lenovo ThinkAgile HX systems using the Lenovo XClarity Essentials Windows OneCLI batch feature
Description
This article introduces the procedure used to set the recommended UEFI settings on ThinkAgile HX systems using the Lenovo XClarity Essentials (LXCE) OneCLI batch feature. The recommended UEFI settings can be found in the following link:
Recommended UEFI settings - Lenovo ThinkAgile HX systems
Note: To follow this procedure, OneCLI must be accessible on a local machine, and that machine must have remote access to the servers. If OneCLI is not installed, refer to the following article before proceeding:
How to install Lenovo XClarity Essentials OneCLI on Windows
Procedure
- Follow the procedure in the Recommended UEFI Settings article to return UEFI to default settings using OneCLI.
Note: In this article,an IP address of 10.10.3.10 and the default username and password is used.
onecli config loaddefault UEFI --bmc USERID:PASSW0RD@10.10.3.10
Note: The recommended UEFI settings presented in this article are subject to change. Refer to the link above, and adjust the document accordingly.
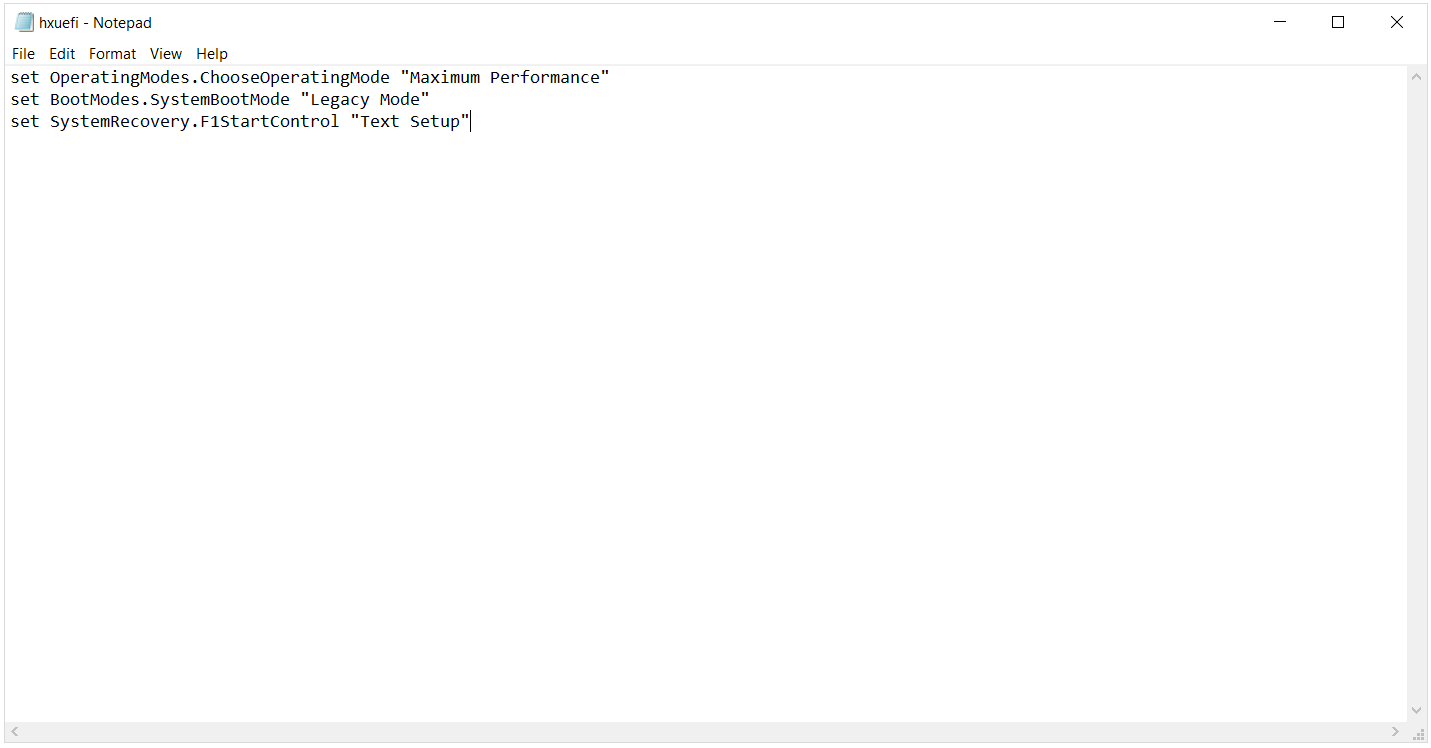
- From the command prompt, run the command set out below. This command will carry out all the changes saved in the text document.
Note: The filename used in this example is hxuefi.txt.
onecli config batch --file hxuefi.txt --bmc USERID:PASSW0RD@10.10.3.10 - When the process is complete, you should see the following output:
Lenovo XClarity Essentials OneCLI lxce_onecli01p-2.7.0
(C) Lenovo 2013-2019 All Rights Reserved
OneCLI License Agreement and OneCLI Legal Information can be found at the following location:
"c:\onecli270\Lic"
Invoking BATCH command ...
Processing....
All commands executed successfully !
Success.
- Reboot the Server for changes to take effect.
Additional Resources
מזהה מסמך:HT509834
תאריך פרסום מקורי:01/18/2020
תאריך עדכון אחרון:04/10/2024
