How to locally mount an ISO through Integrated Management Module II
How to locally mount an ISO through Integrated Management Module II
How to locally mount an ISO through Integrated Management Module II
Description
This article introduces the procedure used to mount an ISO using the Integrated Management Module II (IMM II) remote console.
Applicable Systems
System x server
- System x3100 M4
- System x3100 M5
- System x3250 M4
- System x3250 M5
- System x3250 M6
- System x3300 M4
- System x3500 M4
- System x3500 M5
- System x3530 M4
- System x3550 M4
- System x3550 M5
- System x3630 M4
- System x3650 M4
- System x3650 M4 BD
- System x3650 M4 HD
- System x3650 M5
- System x3750 M4
- System x3850 X6
- System x3950 X6
- iDataPlex dx360 M4
- NetScale nx360 M4
- NetScale nx360 M5
Flex System compute node
- Flex System x220 (7906)
- Flex System x222 (7916)
- Flex System x240 (8737)
- Flex System x240 (7162)
- Flex System x240 M5 (9532)
- Flex System x440 (7917)
- Flex System x440 (7167)
- Flex System X6 (7903)
- Flex System X6 (7196)
BladeCenter server
- HS23
- HS23E
Solution
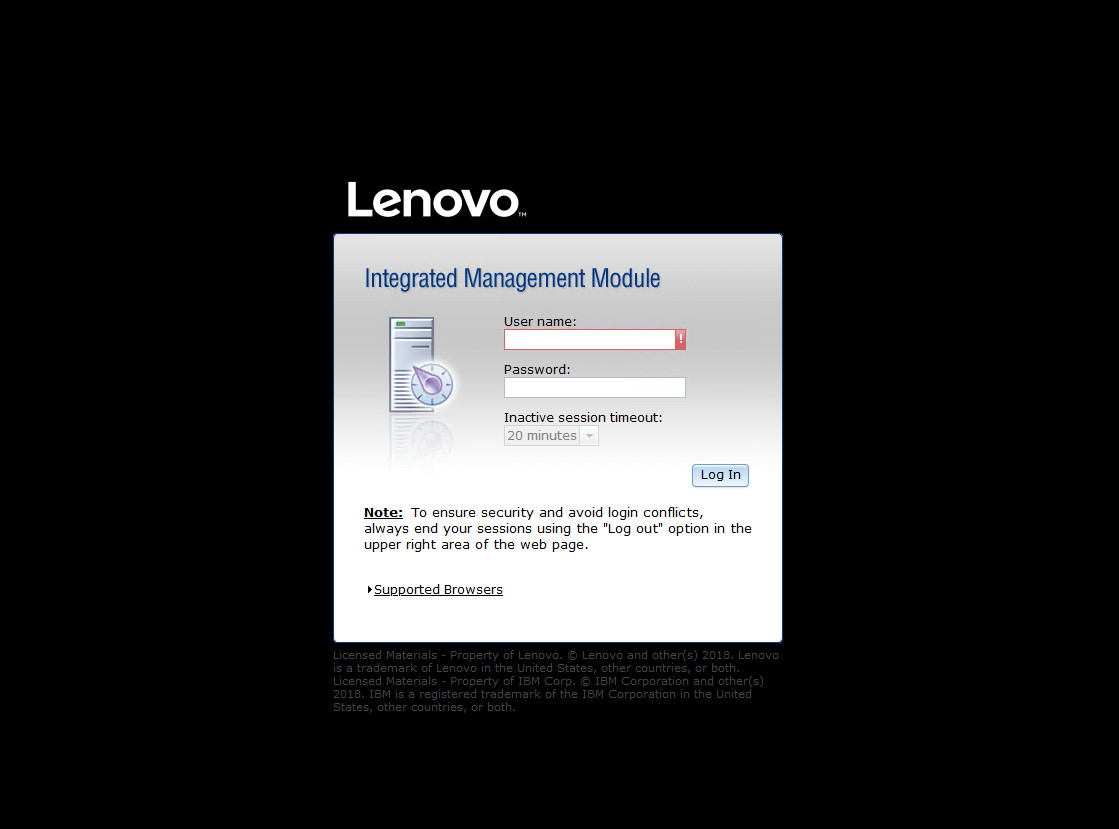
- Log in to the IMM Web GUI.
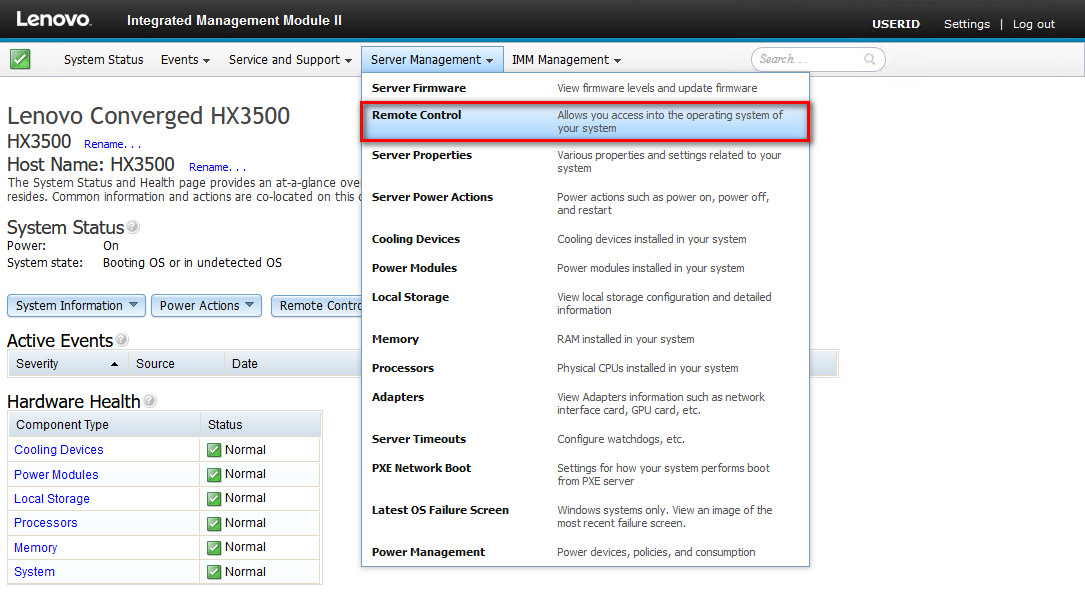
- Select Remote Console from the Server Management drop-down menu.
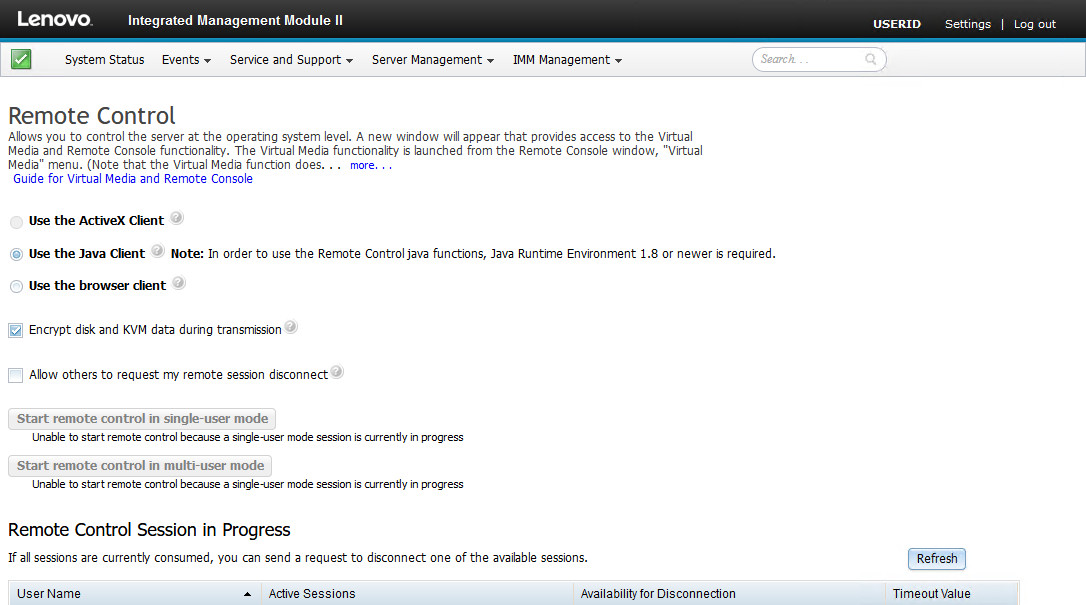
- Select Use the Java Client to open the Remote Console. (Make sure pop-ups are allowed, or allow this pop-up instance.)
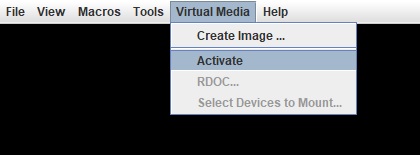
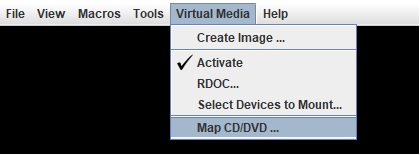
- From the Virtual Media drop-down menu, select Activate.
- From the same menu, select Select Devices to Mount….
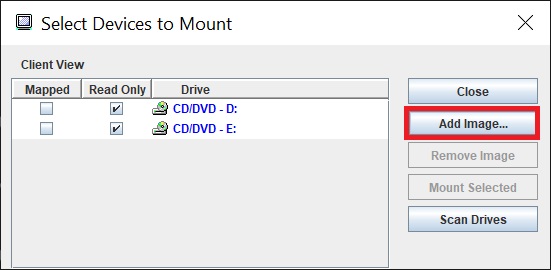
- On the pop-up window, click Add Image....
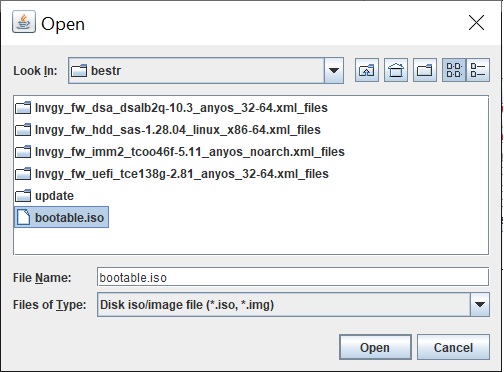
- Locate the ISO image you want to use, and then click Open.
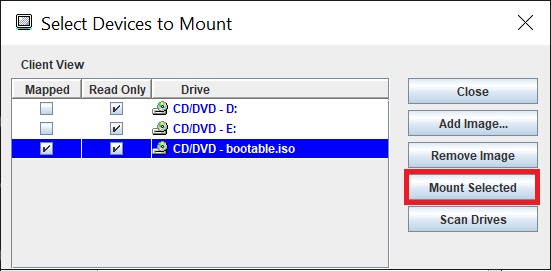
- Select the check box to map the image, and then click Mount Selected.

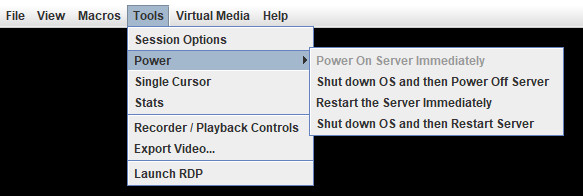
- From the Tools drop-down menu, select Power and then Restart the Server Immediately. You can also restart the server manually.
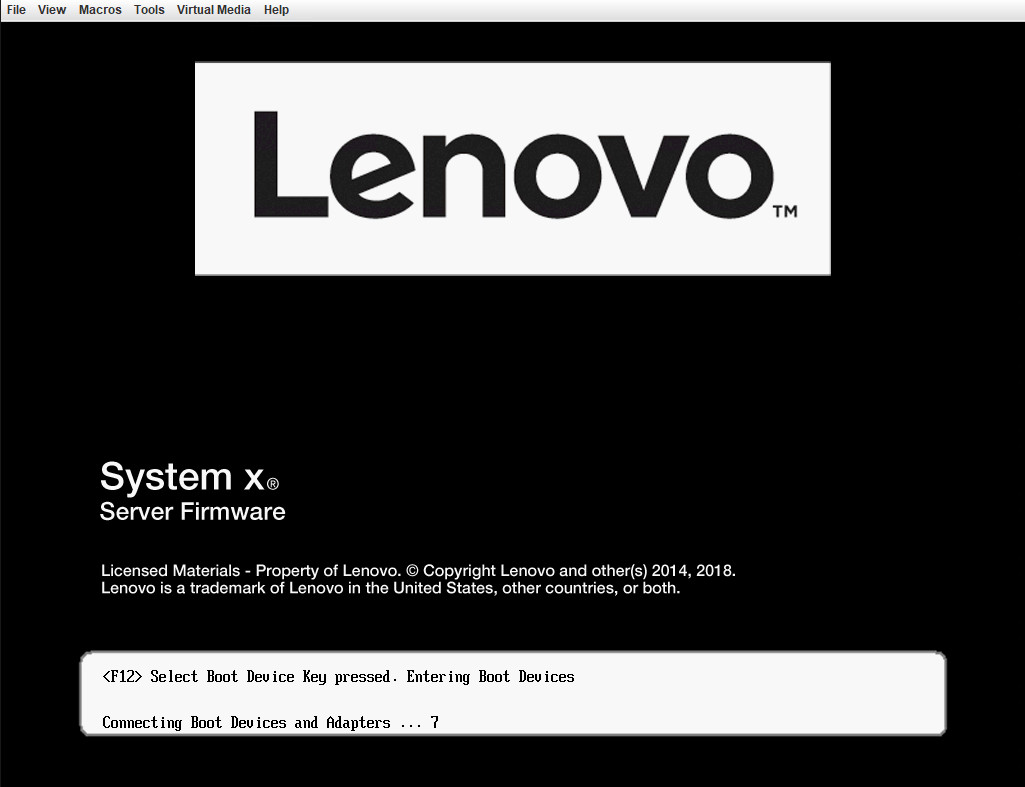
- When the splash menu is displayed, press F12.
- On the Boot Device Manager window, deselect the Legacy Mode option, and then select CD/DVD.
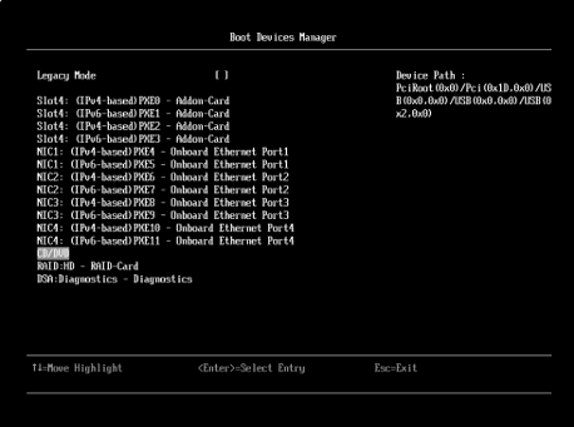
Note: For M3 and M5 Appliances, select the CD/DVD option. For M4 Appliances, select USB4: CD/DVD - USB Port 4 Remote.
- Press Enter to select the entry.
- The server will automatically restart and boot into the selected media.
Additional Information
Related Article
Document ID:HT511764
Original Publish Date:02/03/2021
Last Modified Date:08/22/2024
