How to update the ThinkSystem DM Series Storage controller firmware using the Lenovo ThinkSystem Storage Manager GUI
How to update the ThinkSystem DM Series Storage controller firmware using the Lenovo ThinkSystem Storage Manager GUI
How to update the ThinkSystem DM Series Storage controller firmware using the Lenovo ThinkSystem Storage Manager GUI
Description
This article introduces the procedure used to perform an automatic nondisruptive upgrade of the ThinkSystem DM Series Storage controller firmware using the Lenovo ThinkSystem Storage Manager GUI. You should regularly upgrade the controller firmware to make sure you have all the latest features and bug fixes.
Before proceeding, ensure that all the data has been backed up properly, that the storage array and all drives have an Optimal status, and that no configuration changes are running on the storage array. Upgrading or downgrading a cluster to the current ONTAP release requires planning, preparation, the upgrade or downgrade itself, and several post-upgrade or downgrade procedures. You can use the GUI to verify that the cluster can be upgraded nondisruptively, install the target ONTAP image on each node, and then, execute an upgrade in the background.
Applicable Systems
ThinkSystem DM/DG Series Storage Arrays
Before you begin
- You must have met the upgrade preparation requirements.
- For each HA pair, each node should have one or more ports on the same broadcast domain.
- When a set of nodes is upgraded during a batch upgrade, the LIFs are migrated to the HA partner nodes. If the partners do not have any ports in the same broadcast domain, then the LIF migration will fail.
The software update process includes the following phases:
- Planning for the update
- Preparing for the update
- Performing the update
- Completing post-update tasks
For more detailed information, refer to the following page: Updating software on ONTAP clusters.
Because upgrading ONTAP includes upgrading your firmware, you do not need to update firmware manually. When you perform an ONTAP upgrade, the firmware for your cluster included with the ONTAP upgrade package is copied to each node's boot device, and the new firmware is installed automatically. Firmware for the following components is updated automatically if the version in your cluster is older than the firmware that is bundled with the ONTAP upgrade package:
- BIOS
- Flash Cache
- Service Processor (SP)
- Disk
- Disk shelf
If desired, you can also update firmware manually in between ONTAP upgrades.
Installation Procedure
- Download the firmware update file from the Lenovo DCG Support Web site.
- Navigate to datacentersupport.lenovo.com.
- Enter a valid DM Series machine type in the search box, and then select the page for the machine type.
- Select the Drivers & Software tab.
- In the Warranty check area in the top right, enter a valid DM Series serial number.
- Expand the Product Firmware option.
- Download the desired controller firmware update bundle . You can save and extract the bundle to a folder on the local hard drive, or save the file to an http, https, sftp, or ftp server.
- The ftp server must be configured with no authentication. The http server must use port 80 for file downloads.
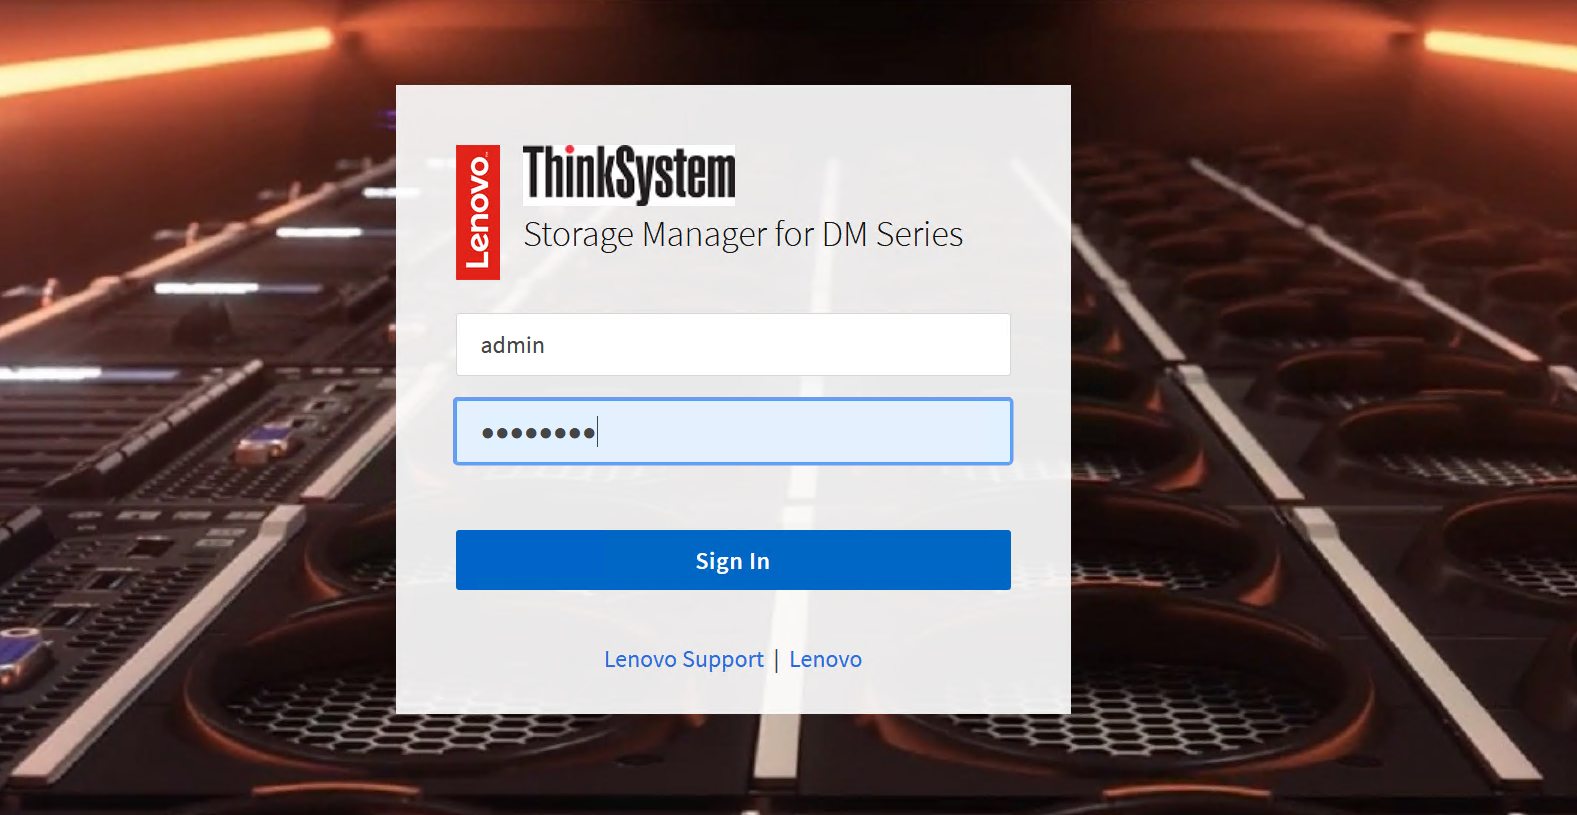
- Login to the Storage Manager GUI using the admin account and password.
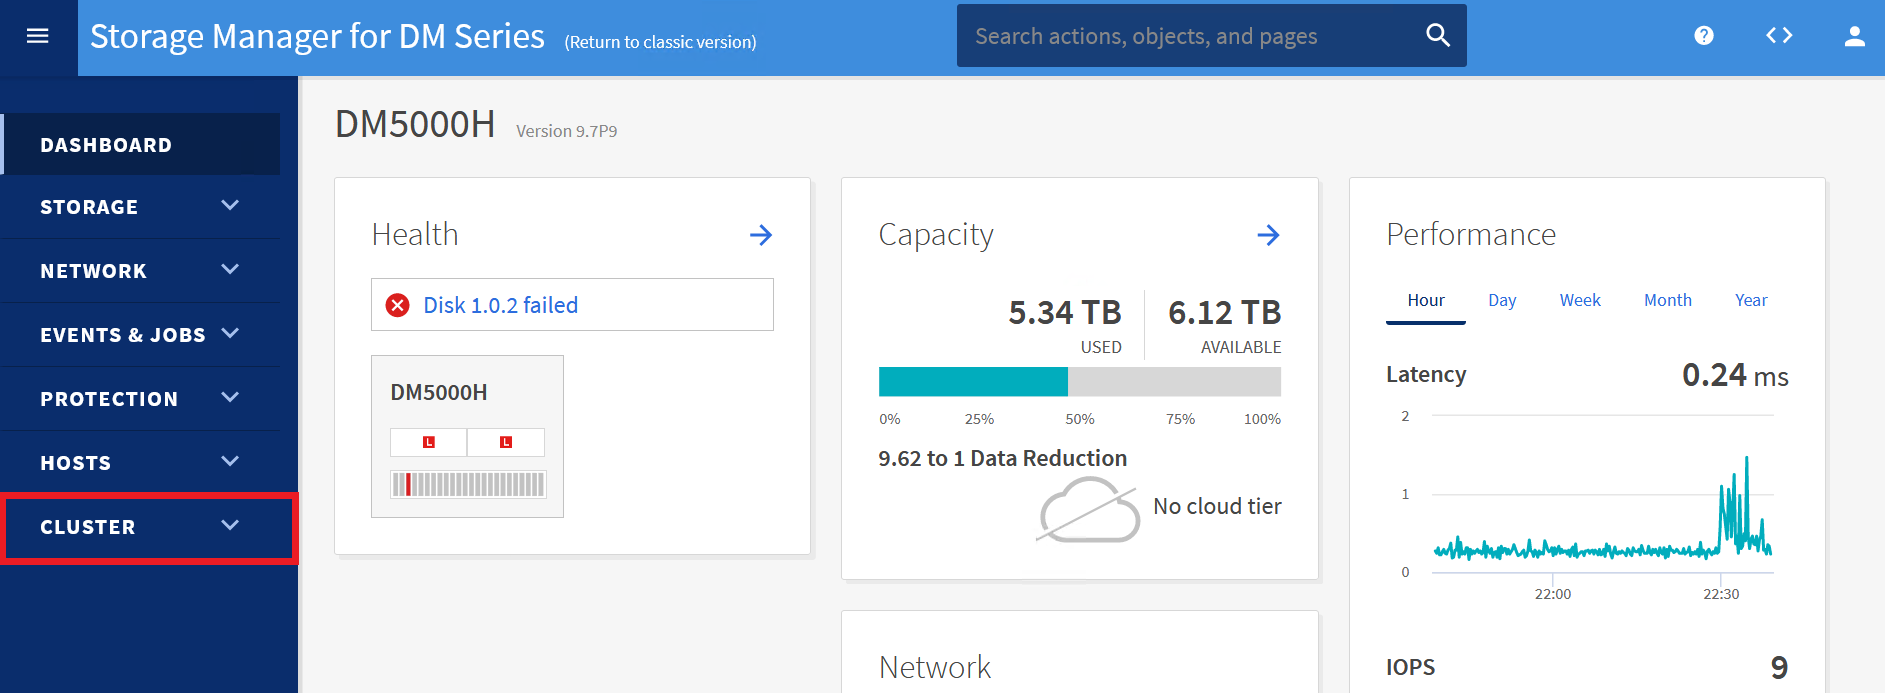
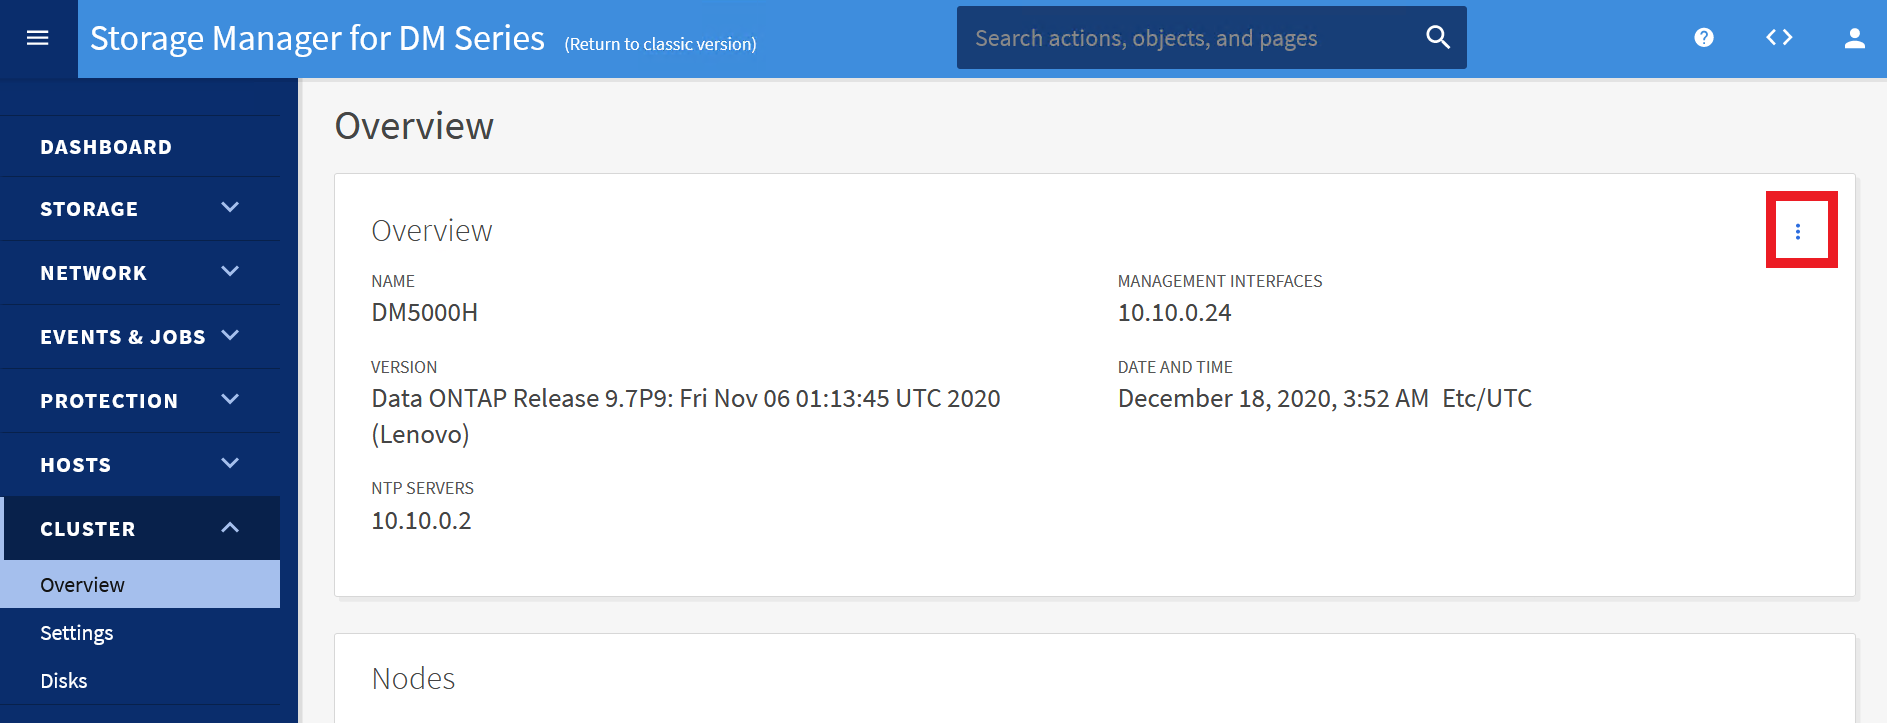
- Expand the CLUSTER drop-down menu.
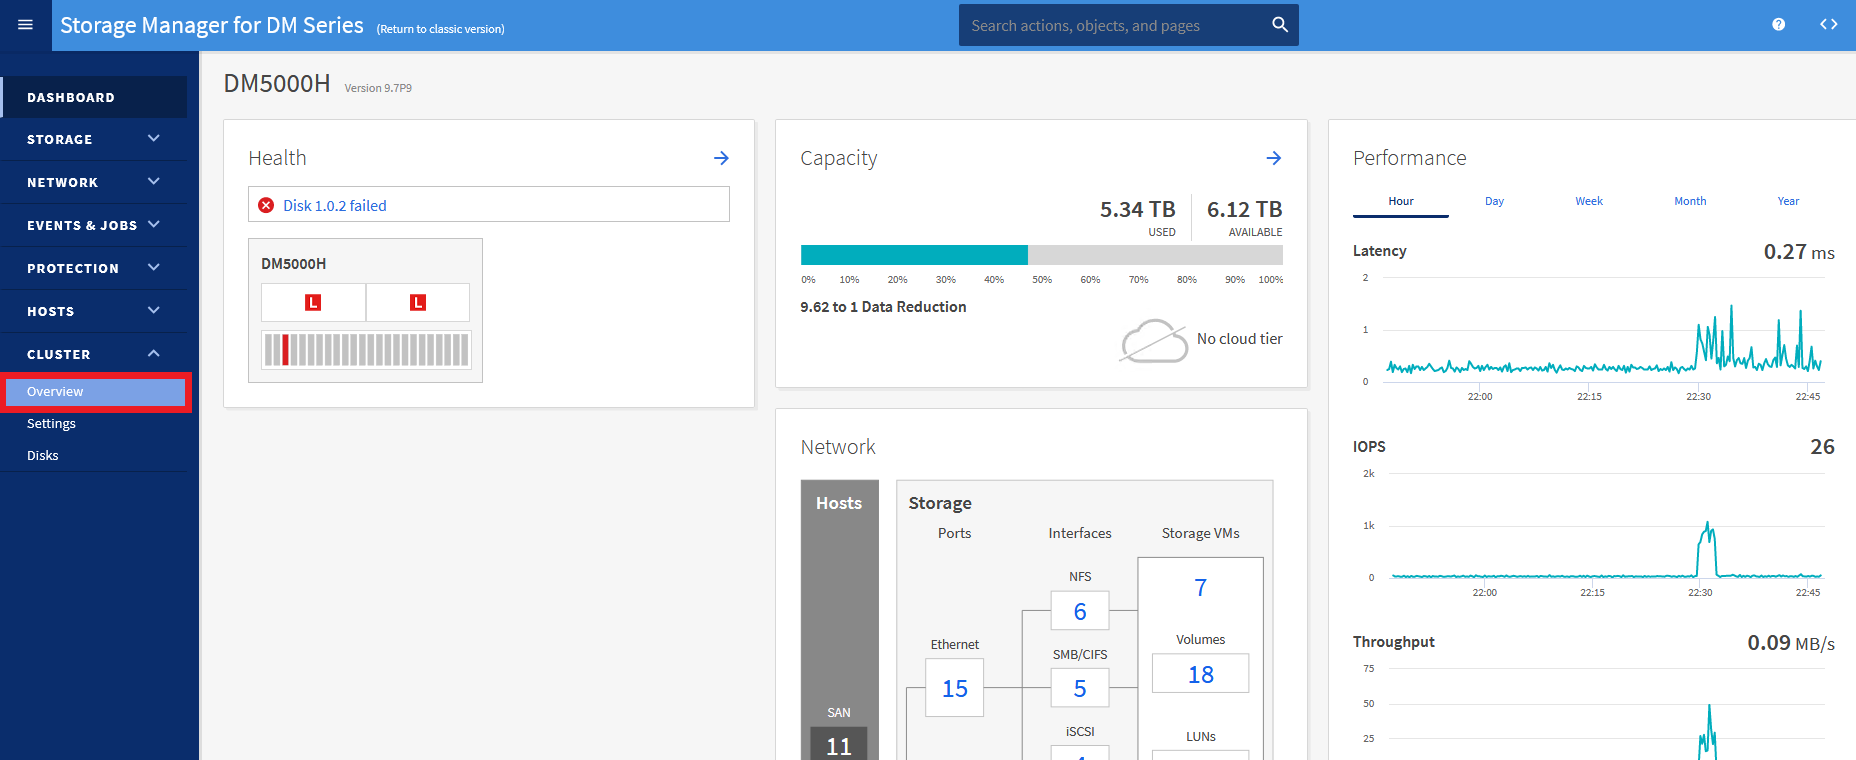
- From the drop-down menu, select Overview.
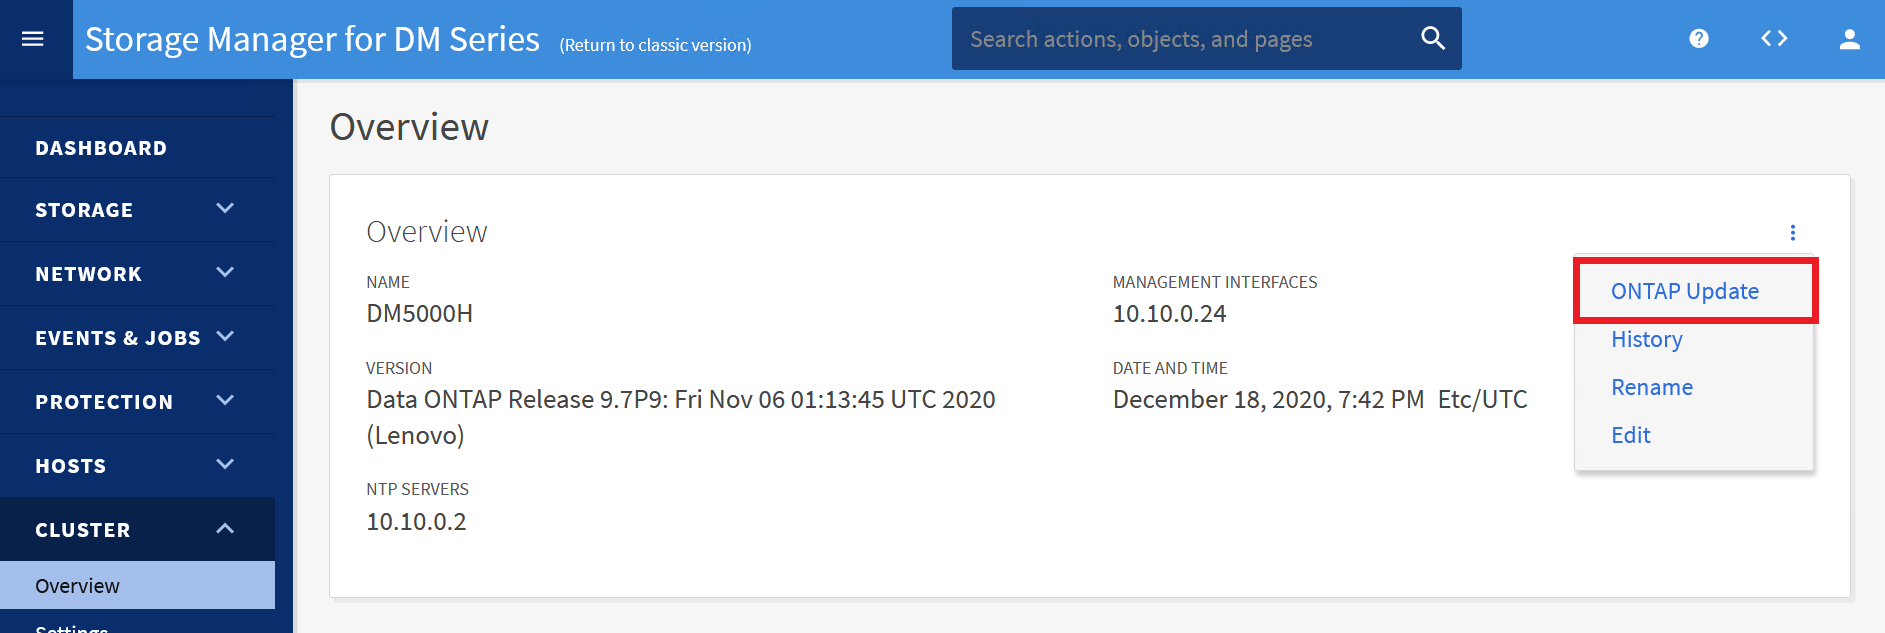
- In the Overview area, look to the right for three dots. Click the dots to expand a context menu.
- Select ONTAP Update.
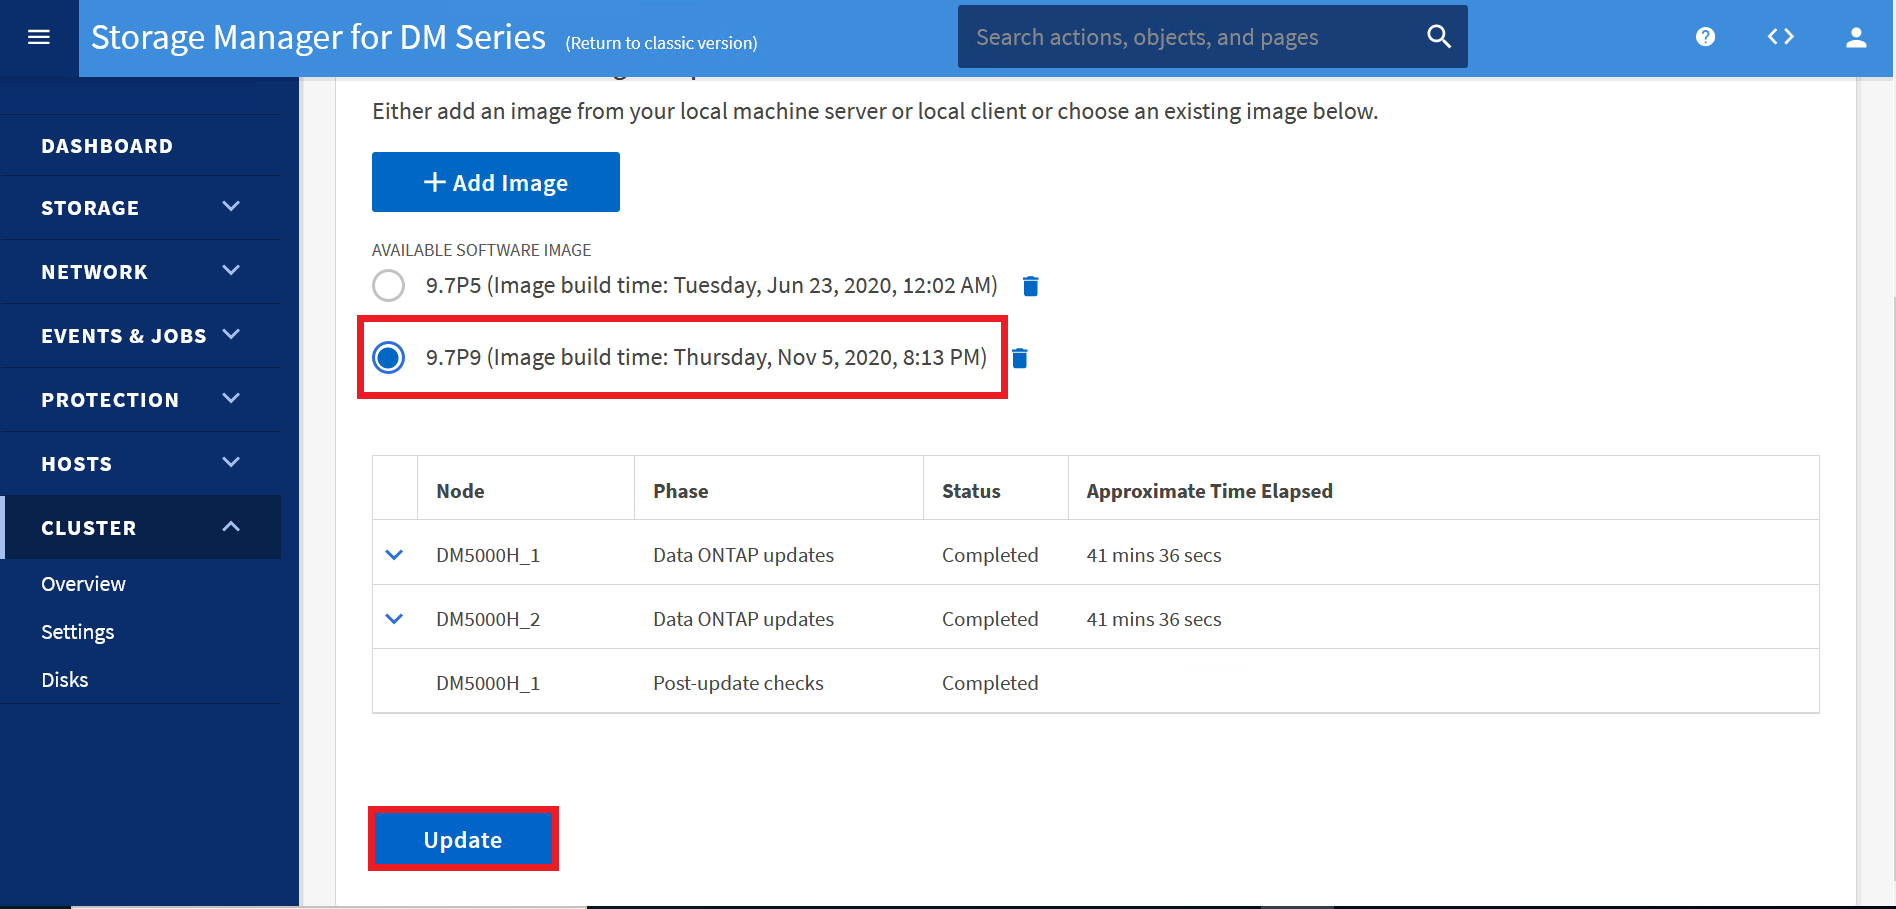
- Click + Add Image, or select an available image if it was previously uploaded.
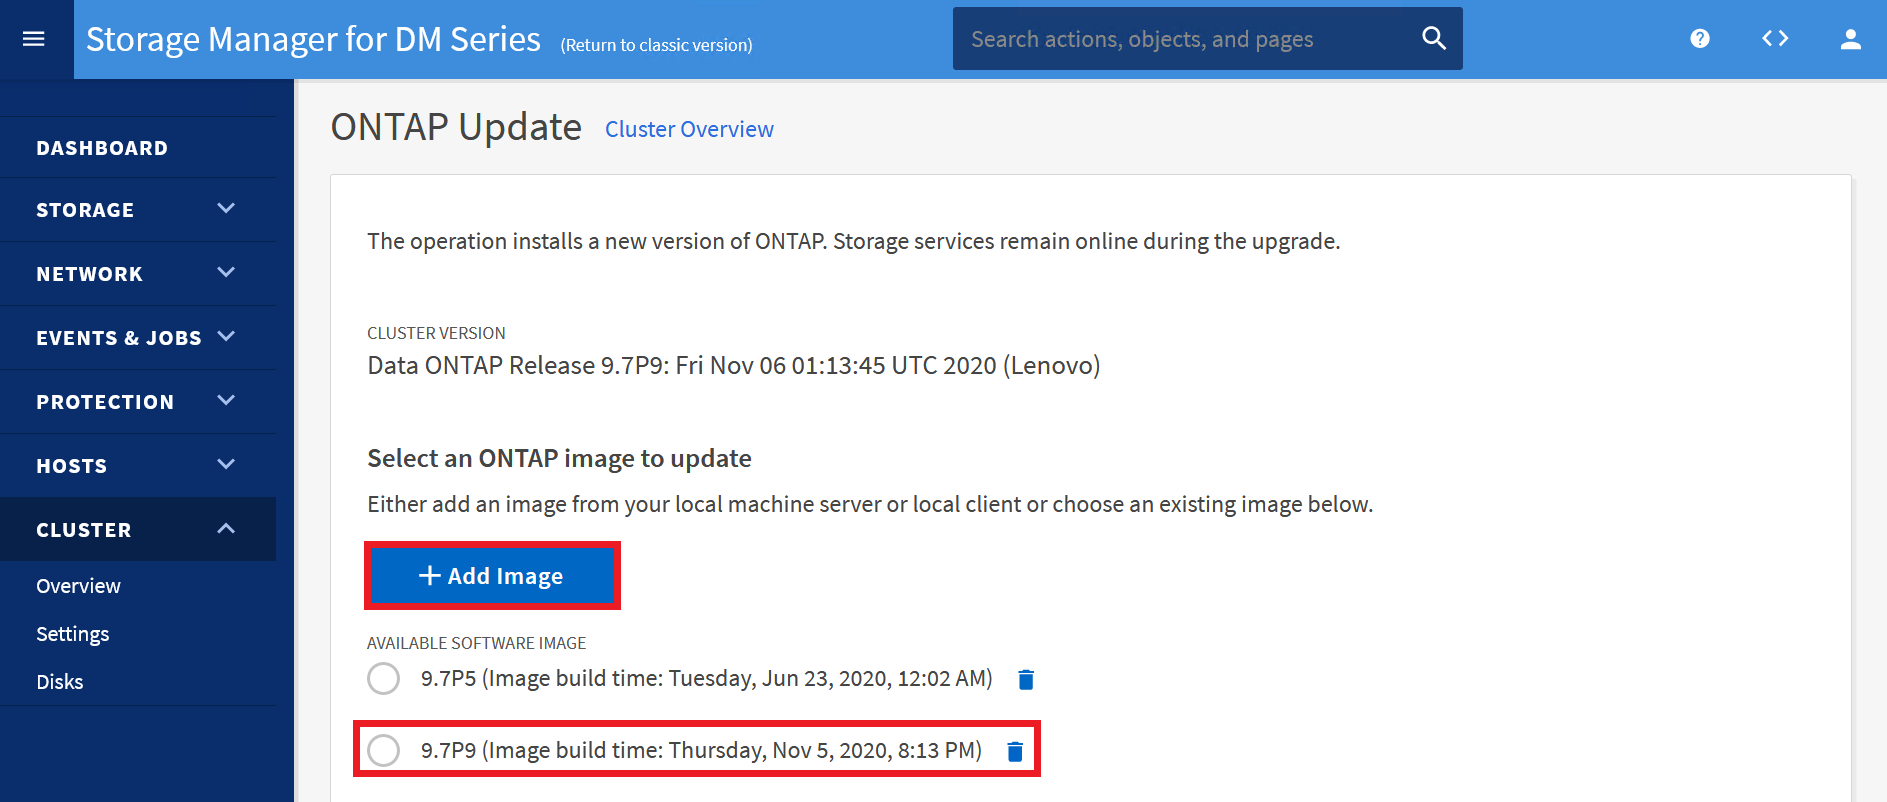
- Select From Local Client or From Server depending on where the file is located.
- From Local Client will add a new software image from the local client. Go to Step 9.
- From Server will add a new software image from an http, https, sftp, or ftp server on your network. Go to Step 10.

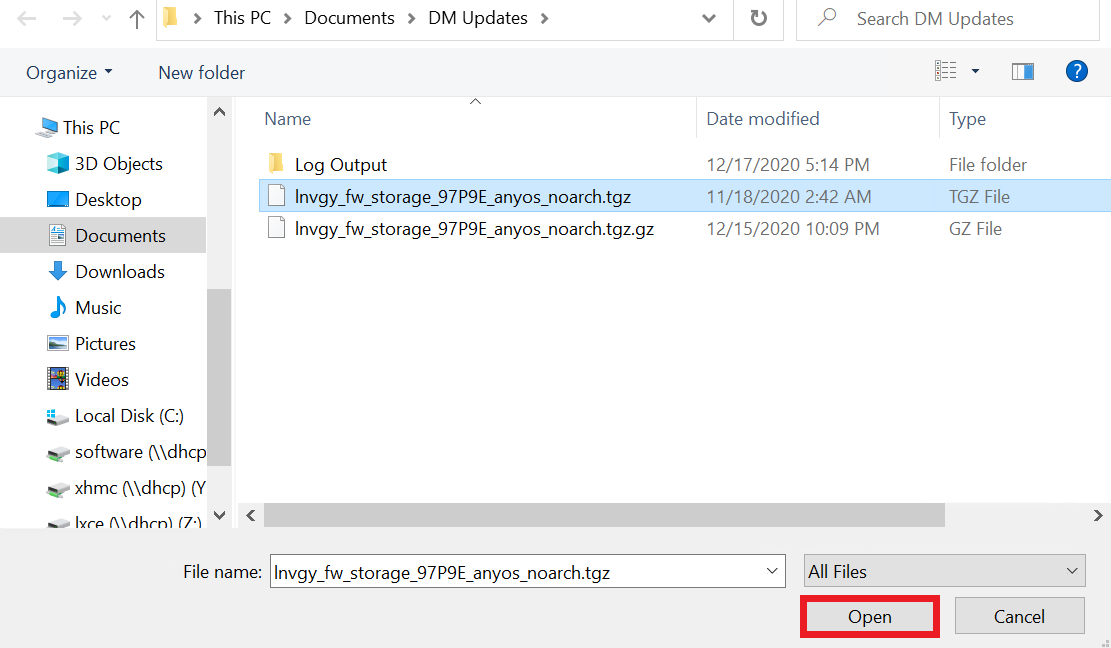
- Local Client
- Browse to the location where you saved and extracted the software image, select the image, and then click Open.
- The software image will upload after you click Open.
- From Server
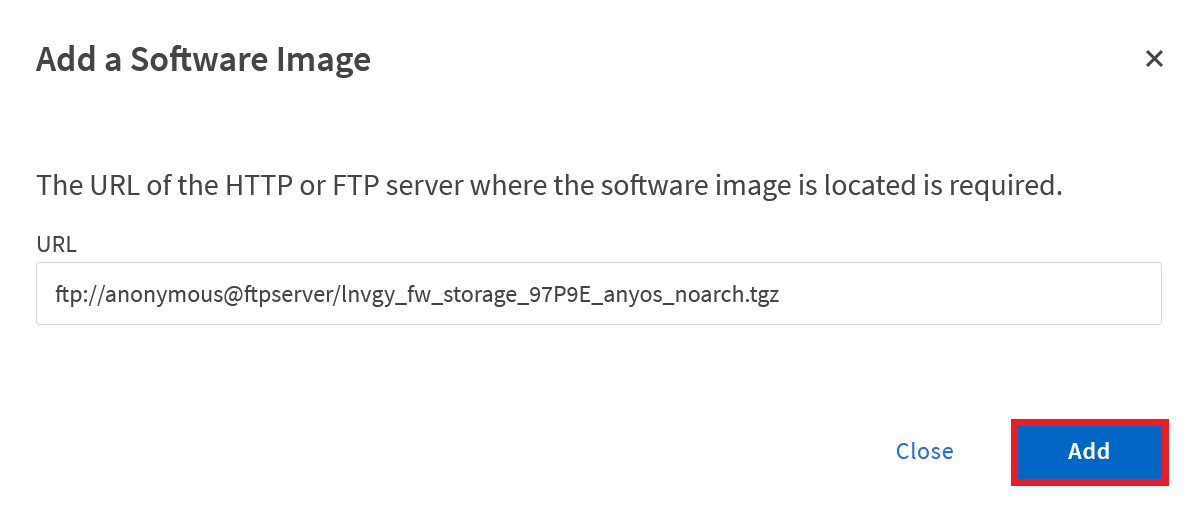
- In the Add a New Software Image dialog box, enter the URL of the HTTP server or FTP server on which you saved the image that was downloaded from the Lenovo Support Site.
- For an anonymous FTP, you must specify the URL in the
ftp://anonymous@ftpserver format. - Click Add.
- When the image has been uploaded, select the image to update and click Update.
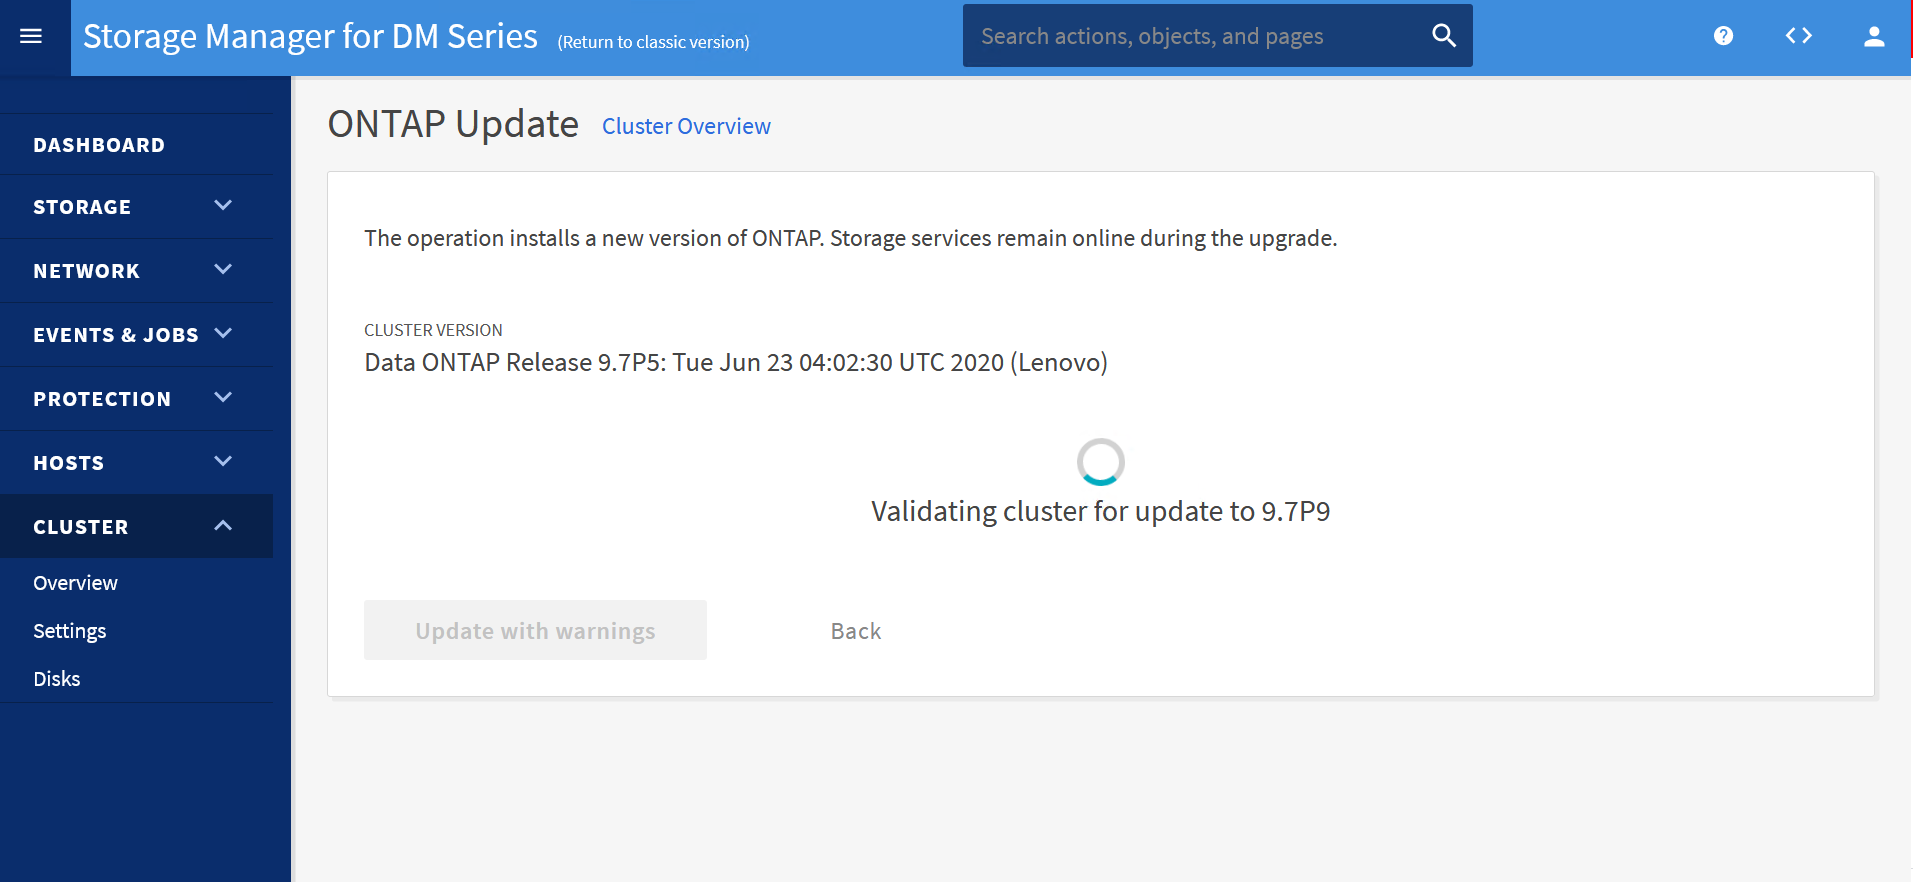
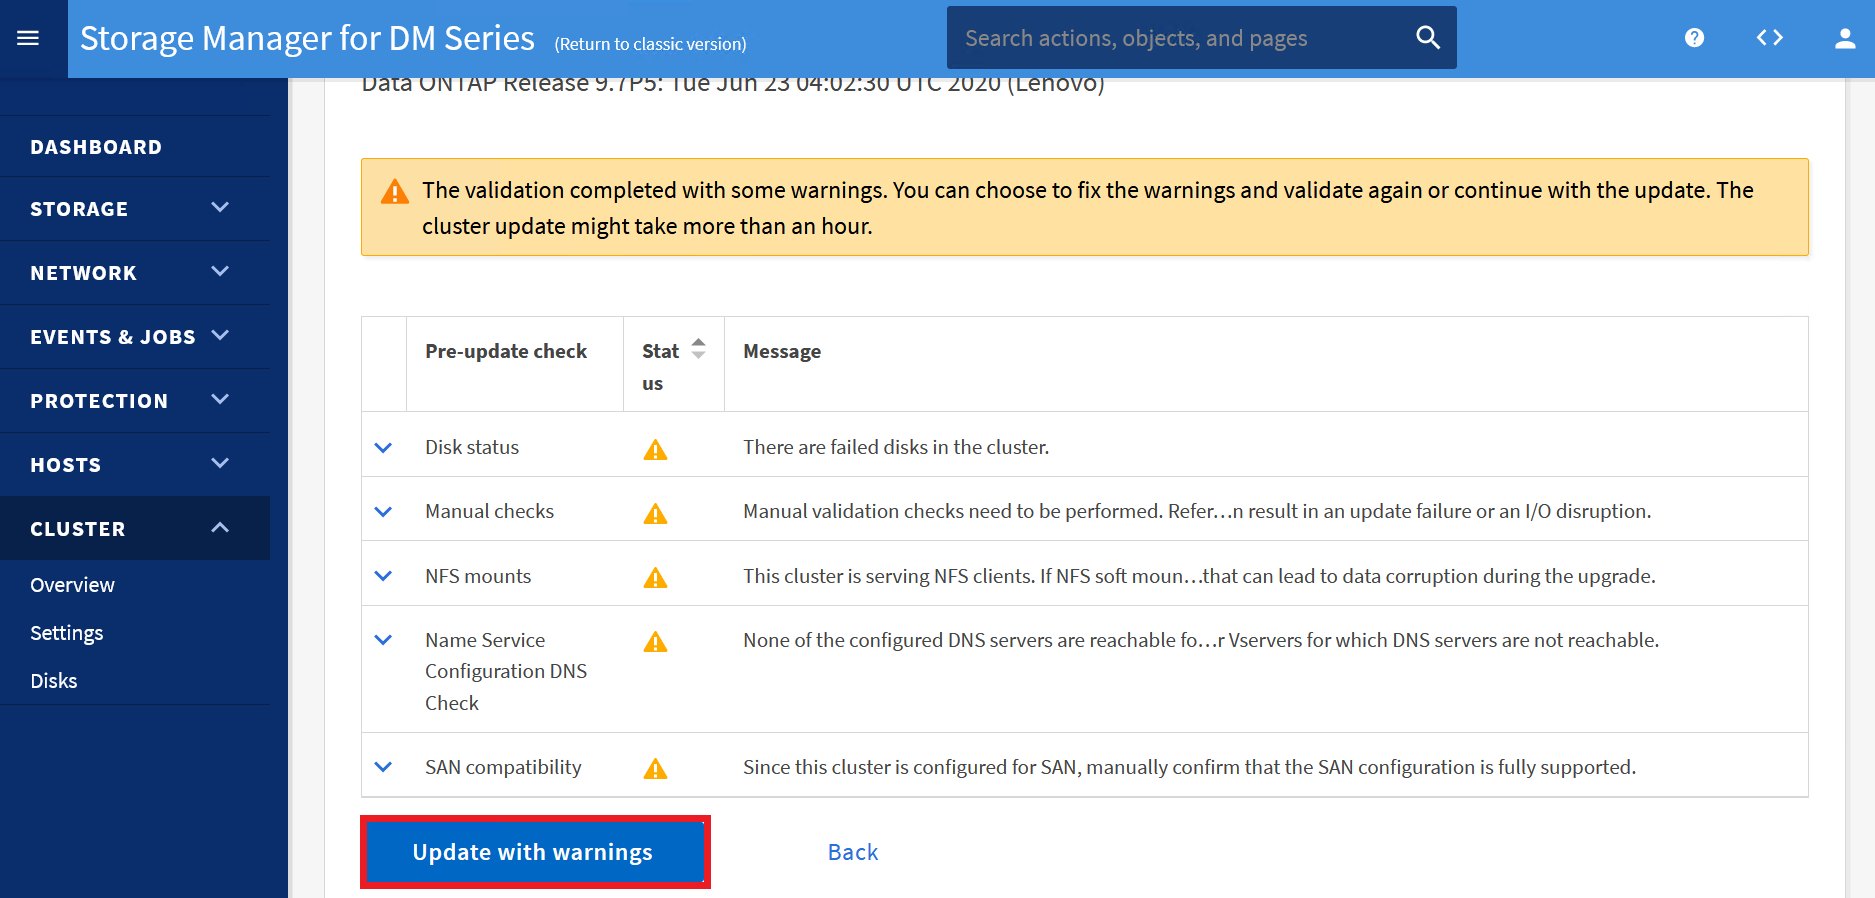
Note: A validation will automatically occur before the update. ONTAP checks the cluster components to validate that the upgrade can be completed nondisruptively. The system will perform validation and return warning messages for any issues discovered. It also displays any required remedial actions that you must perform before updating the software. When complete, you might receive a warning about manual checks that need to be performed.
Important: You must perform all of the required remedial actions for the errors before proceeding with the update. Although you can ignore the remedial actions for the warnings, the best practice is to perform all of the remedial actions before proceeding with the update.
- When these checks haver been performed and the required remedial actions have been taken, click Update again to proceed.
Note: During the update, each of the controllers will be updated one at a time.- If the cluster consists of two to six nodes, a rolling upgrade will be performed. If the cluster consists of eight or more nodes, a batch upgrade will be performed by default.
- After completing each takeover and each giveback, the upgrade will wait for eight minutes to enable client applications to recover from the pause in I/O that occurs during the takeover and giveback.
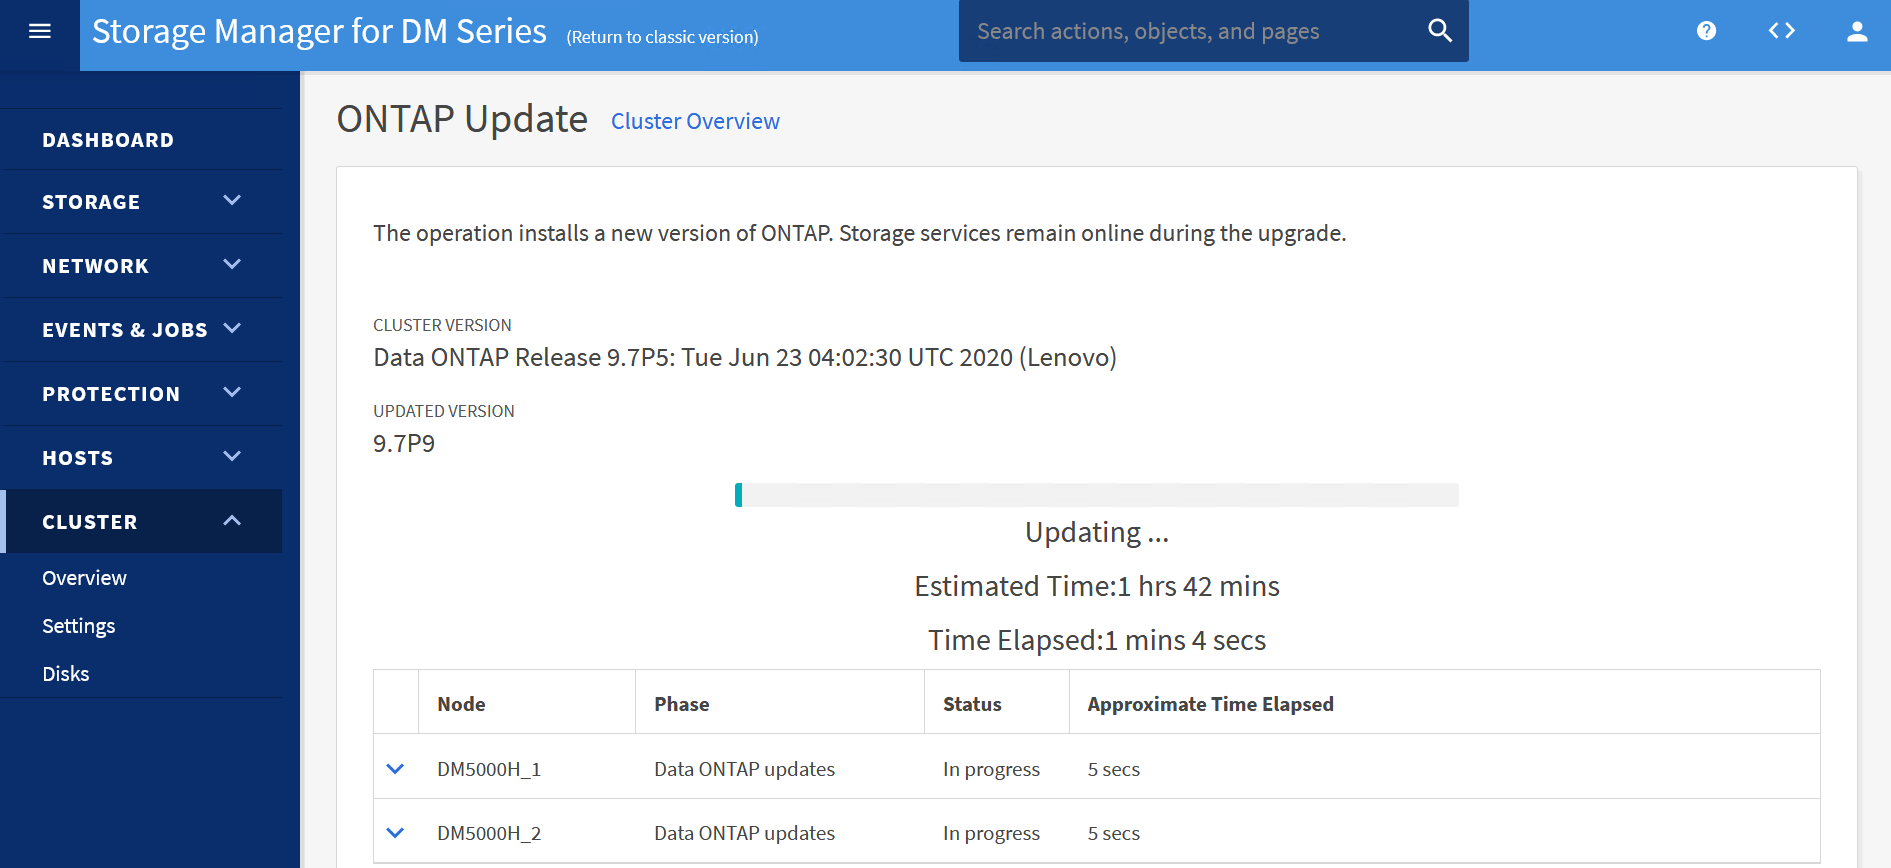
- After the first controller is updated, you will lose connectivity and will have to reconnect to the GUI again to view the final process of updating the second controller.
Post Upgrade Tasks
- When the cluster update has finished, verify that the cluster has successfully updated to the selected version.
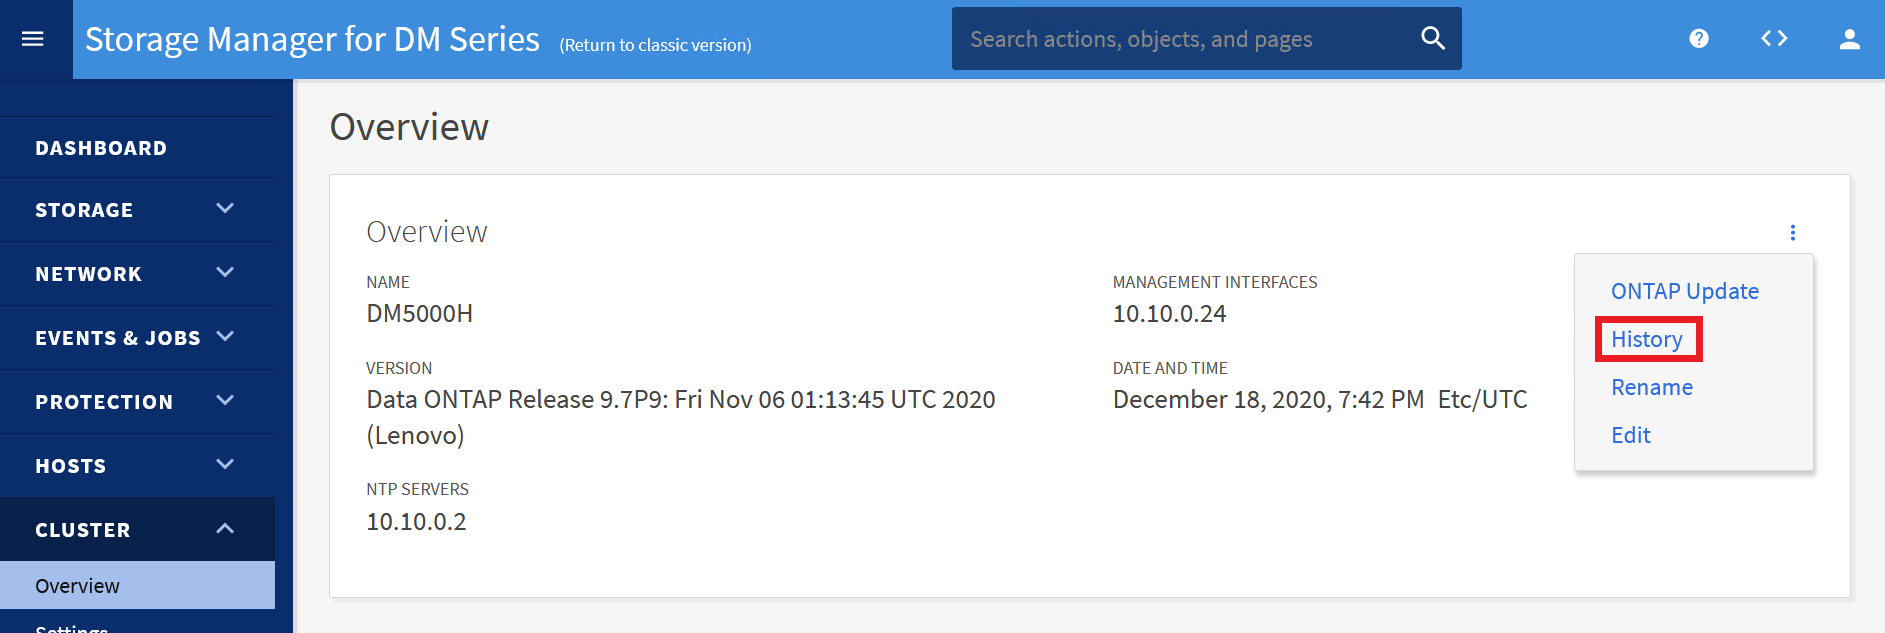
- Expand the CLUSTER drop-down menu.
- From the drop-down menu, select Overview.
- In the Overview area, look to the right for three dots. Click the dots to expand a context menu.
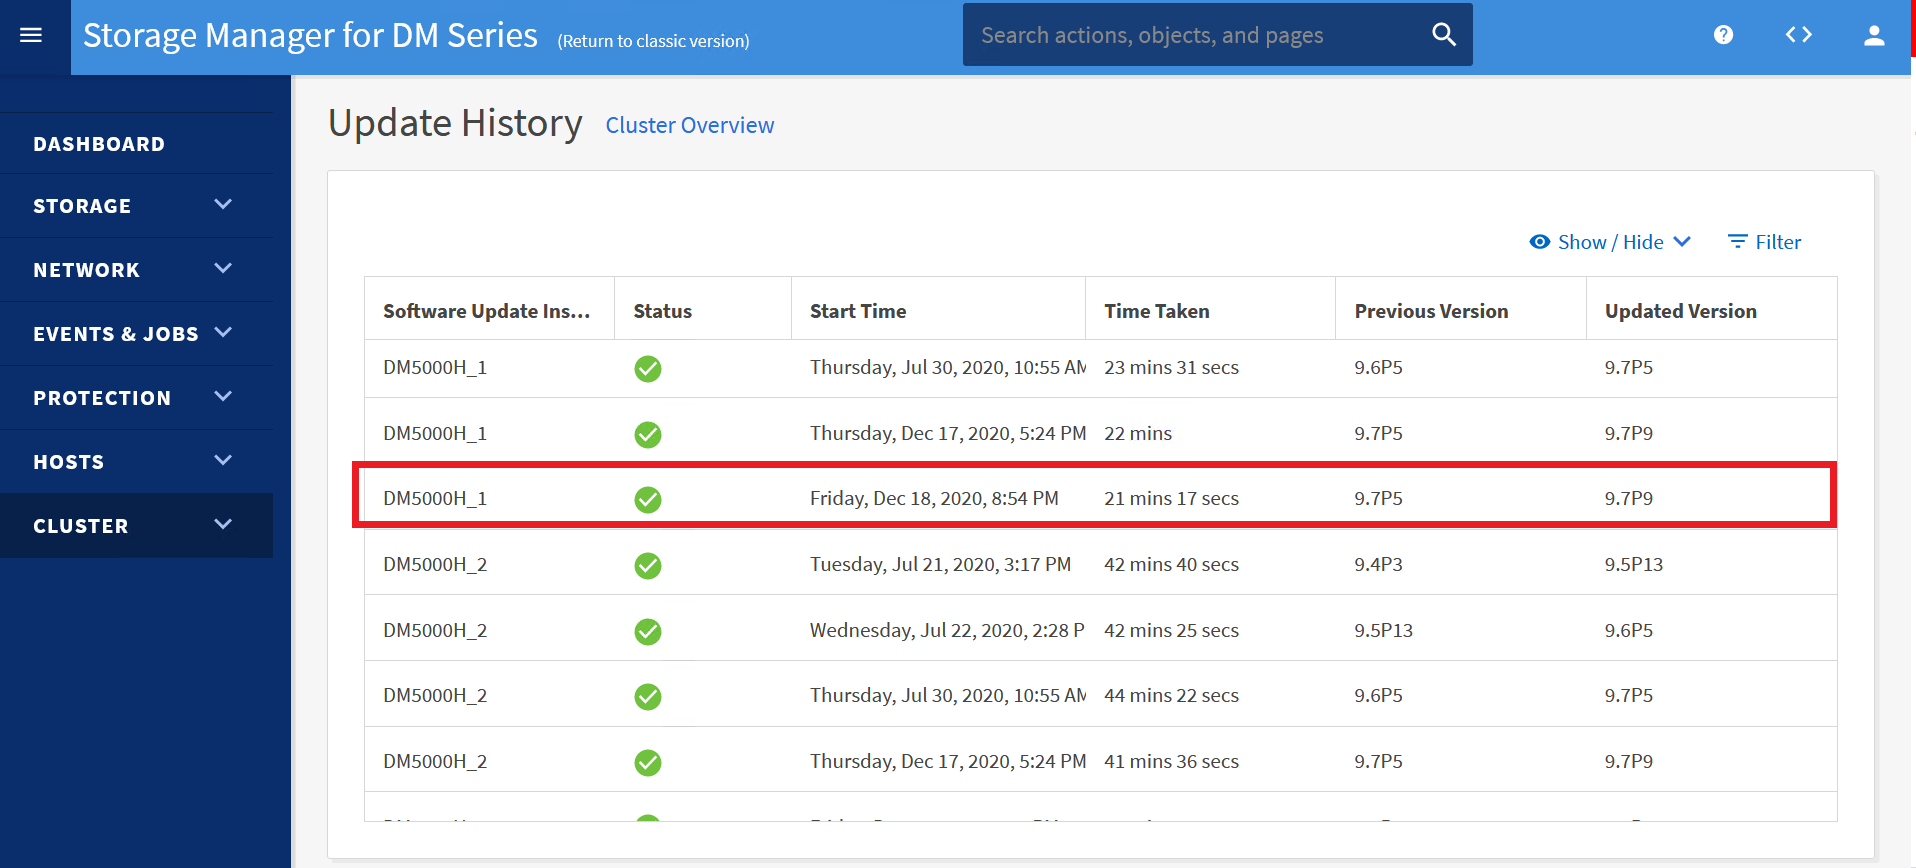
- Select History.
- Verify that the update completed successfully.
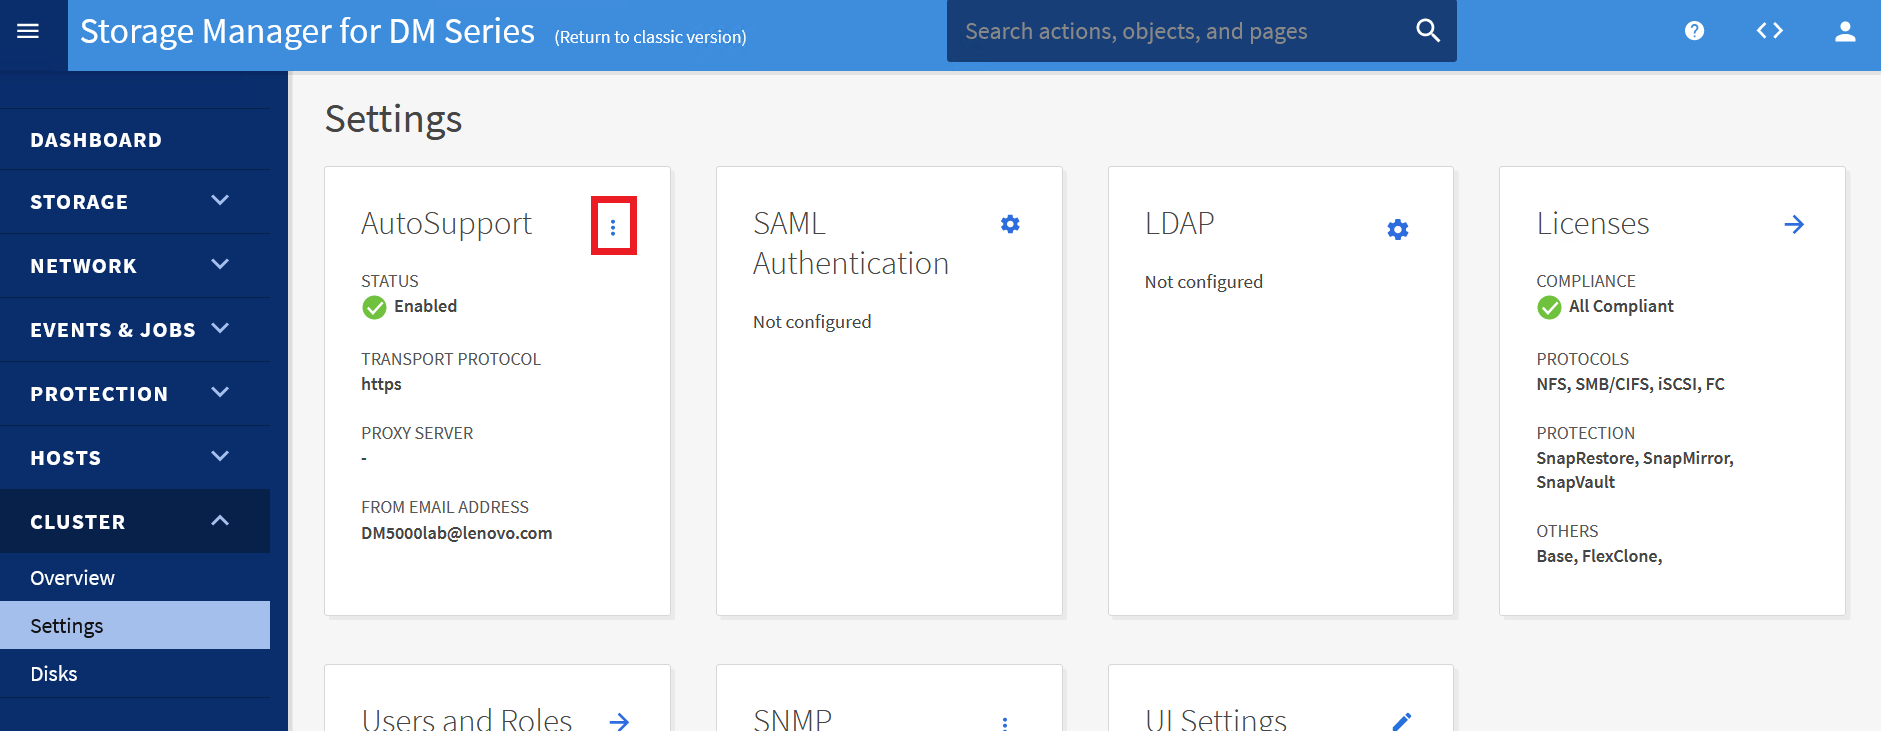
- Browse to Cluster, and then click Settings.
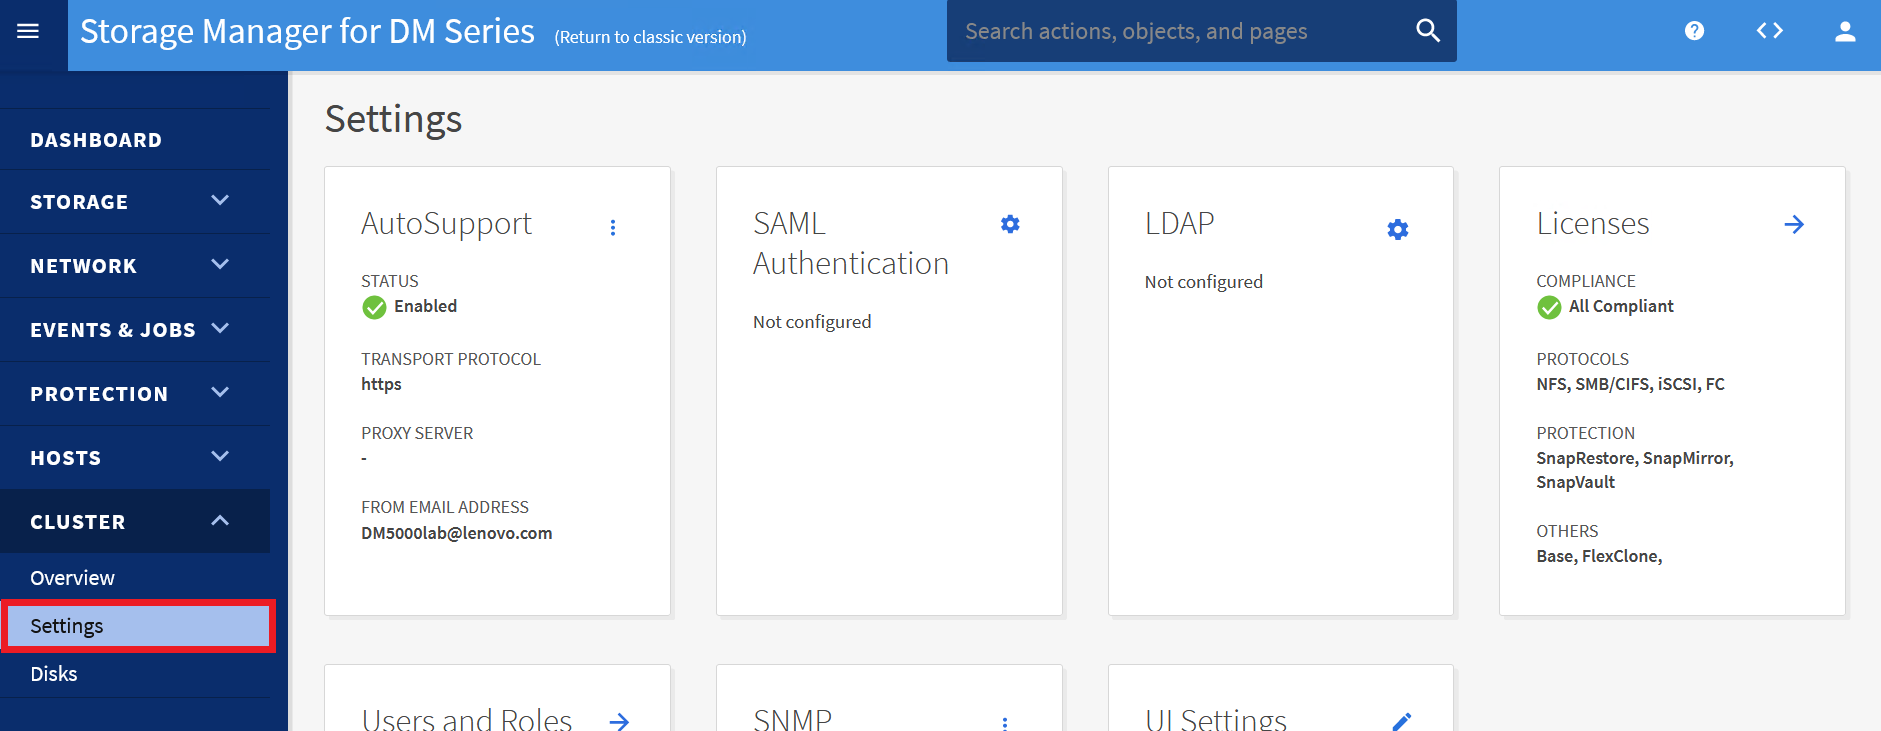
- In the AutoSupport tab, click the dots to expand a context menu.
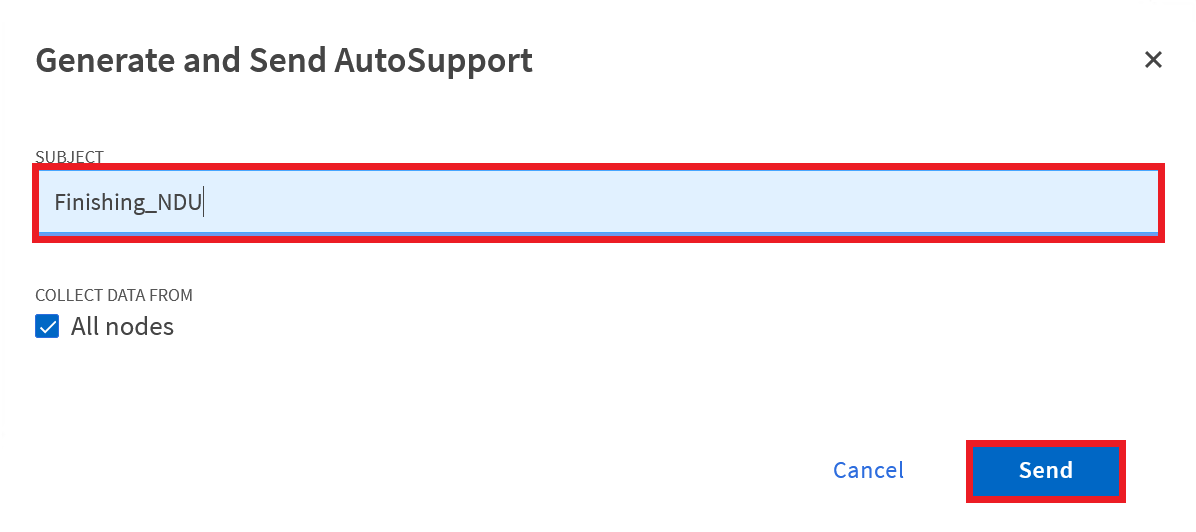
- Select Generate and Send to trigger an AutoSupport notification.
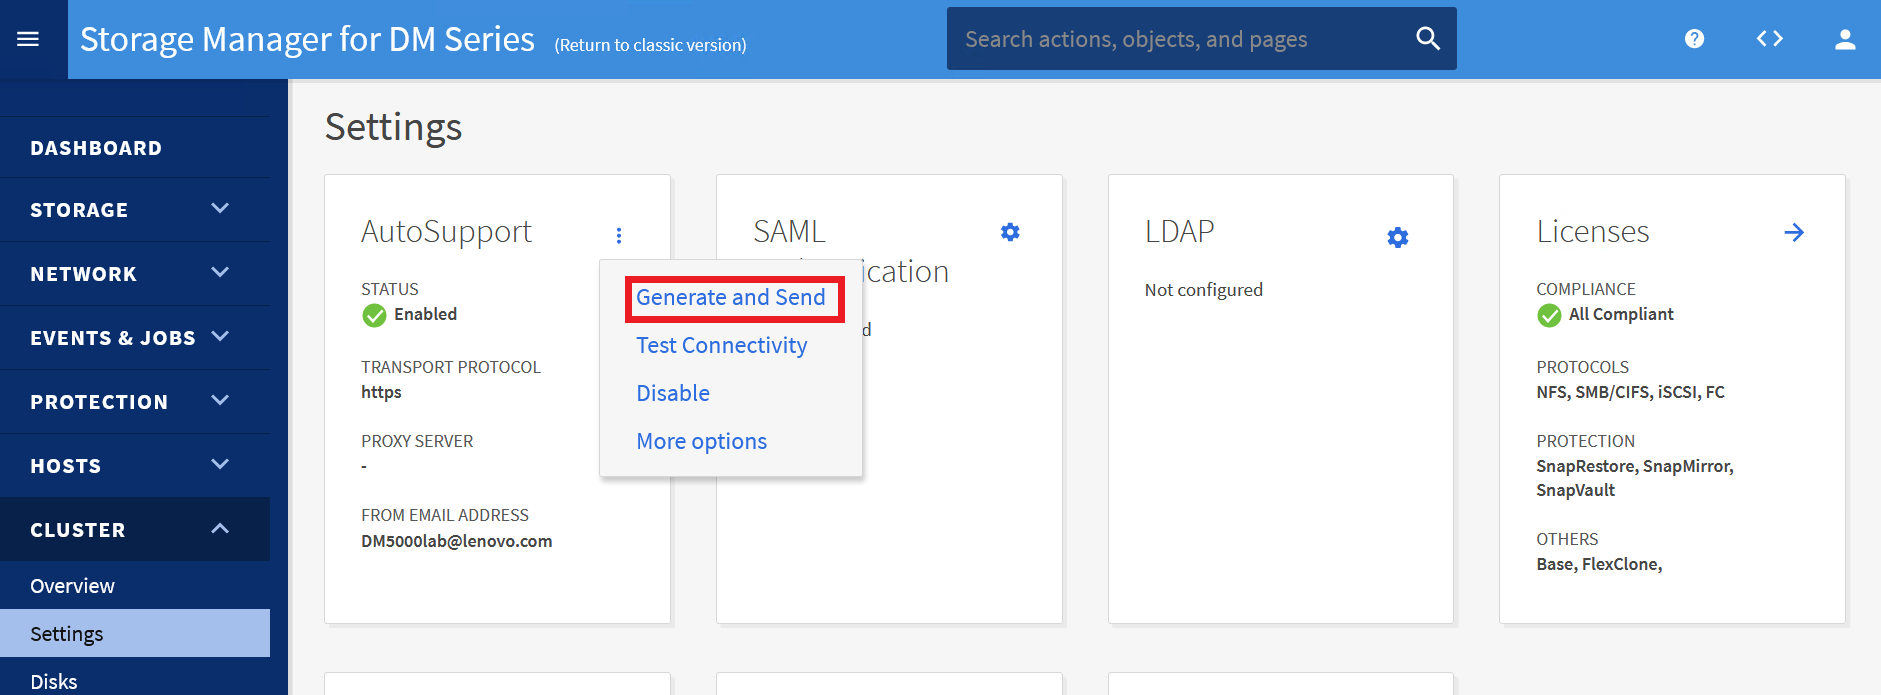
- In the SUBJECT field type "Finishing_NDU", and then click Send.